Overview
Expand the Qlik Sense Reporting for Non-Qlik-Users
Klikshots enables you to create and distribute reports from Qlik Sense applications.
Klishots generates reports based on Qlik Sense sheets, or on Qlik Sense entities.
You can deliver reports at scheduled times or when they are requested by individual users. Final reports are static files that contain copies of the original Qlik Sense data as it was at the time the report was generated.
Klishots can distribute the report appling user filters before distributing reports. Each recipient receives reports with data that has been filtered for them.
THE EASIEST WAY to create and distribute reports from Qlik Sense to non-Qlik users!
Take Qlik Sense snapshots Select Data |
Apply user based bookmarks & Filters Create and reuse filters |
Distribute Insight Analytics Schedule and Send your reports |
Main Features
Security (Access Control & Authentication)
Authentication
A logon window contains a Password and User Name fields.
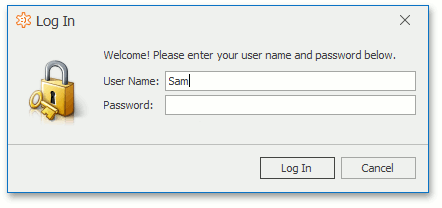
All passwords are encrypted and verified using RFC 2898 algorithm.
Administrative Permission
The IsAdministrative option grants all available permissions to a role.
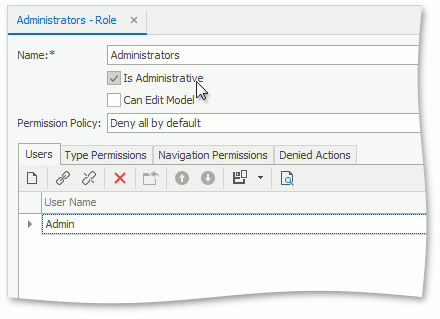
You cannot deny any rights for a role with the Administrative Permission.
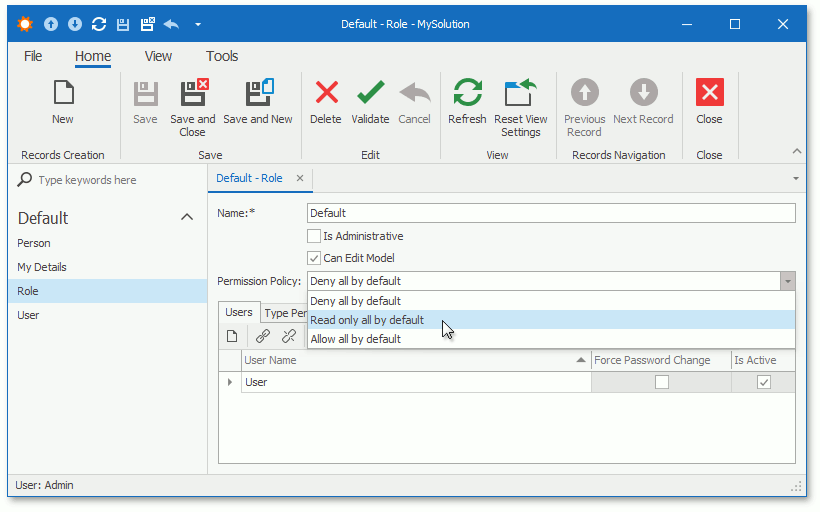
Permission Policy
The Permission Policy determines the Security System’s behavior when a specific type, object, or member does not have explicitly specified permissions.
Navigation Permissions
The IsAdministrative option grants all available permissions to a role.
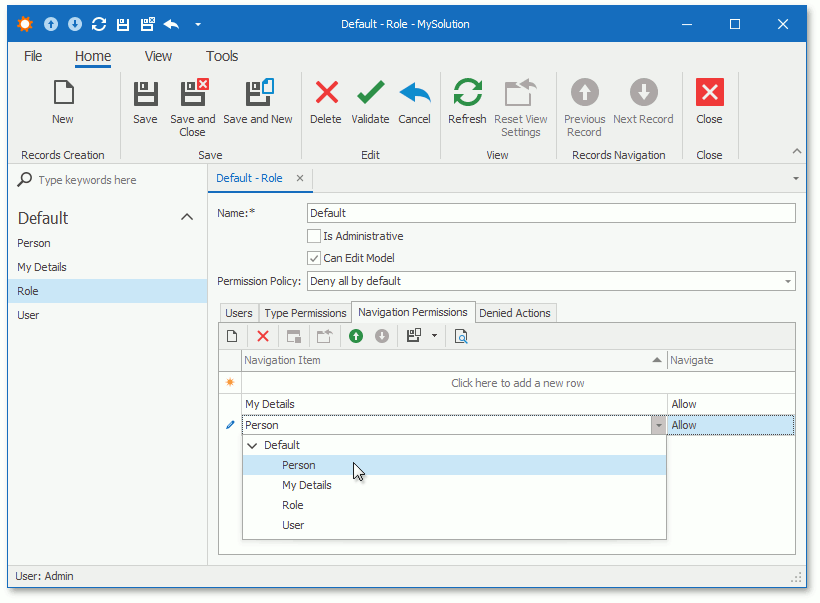
Item permissions have a greater priority than group permissions. For instance, if you deny access to the group, but grant access for one of its items, this item is enabled in the navigation control.
Report types
Sheet
A Qlik Sense application sheet with all his objects


Object
A single Qlik Sense object

Export content types
Many export types
PDF XLX IMAGE
- Xlsx
- Image
- more...
Many destination types
- InApp
- Folder
- Ftp
- more...
Documentation
Klikshots a report distribution application for Qlik Sense
Thank you so much for purchasing Klikshots.
- Version: v23.01.31
- Author: Envision Ltd
- Product Page: Klikshots
- Created: 5 Jan, 2023
- Update: 31 Jan, 2023
If you have any questions that are beyond the scope of this help file, Please feel free to email at KlikSheet Support Email - support@applybi.com.
Get It!
Installation
Follow the steps below to setup KlikShots:
- Double click setup executable.
- After setup completes the application will execute automatically until the login screen. Press "Login" button to Login as Demo User
- There would be two shortcuts on your desktop "Klikshots" and "KlishotsSetup".
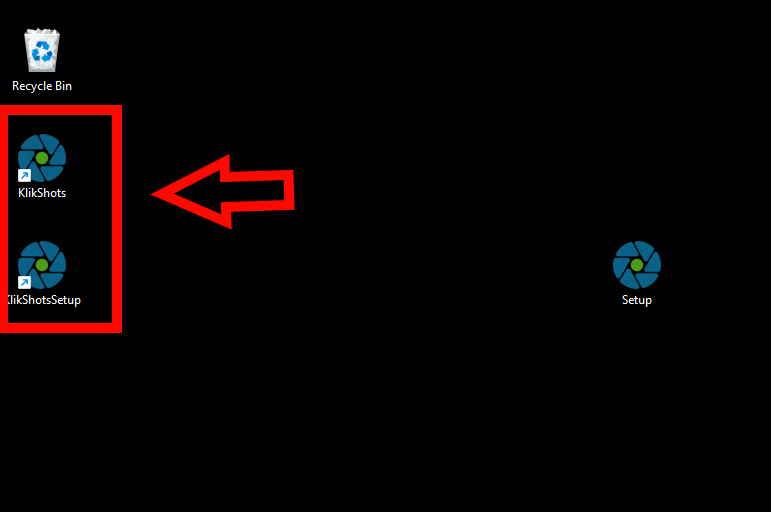
- Close the application if it is already open.
- Double click "KlishotsSetup" shortcut on your desktop to execute setup application.
- When setup application executes click "Select DB connection" button to setup a MSSQL connection string.

- In the connection properties screen fill Data Source, Server Name, Authentication details and Database Name then Press "OK" button.

- Double click "Klishots" shortcut on your desktop to execute and login KlikShots. (Username: KlikAdmin and blank Password)
Layout
KlikShots Navigation bar and Ribbon panel:
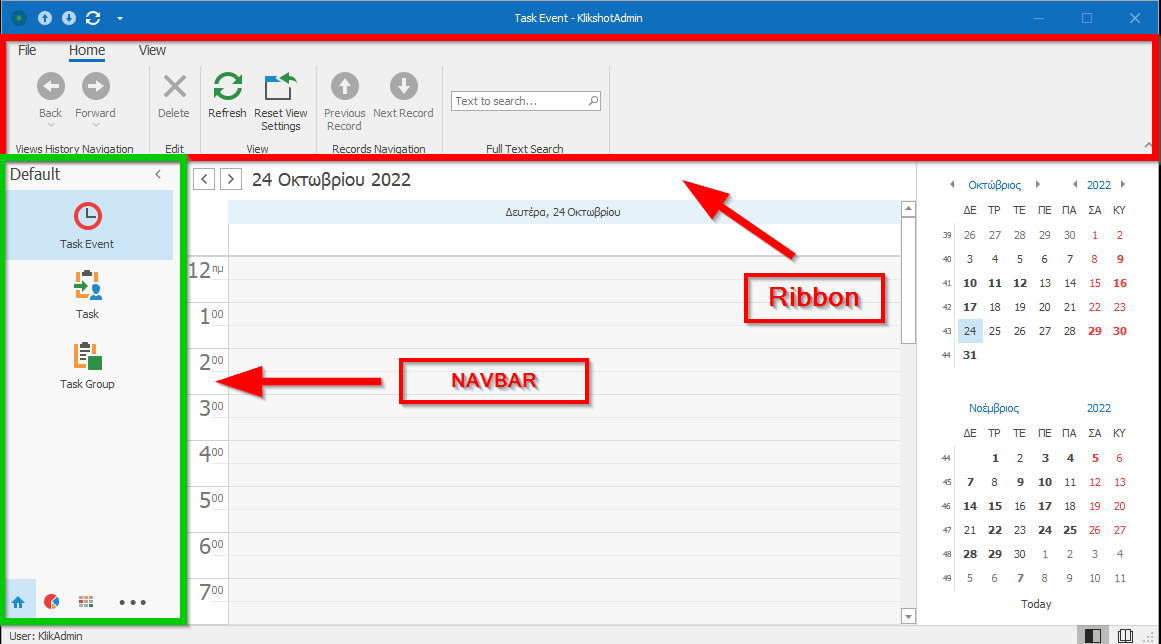
The Navigation bar is used to navigate the user through diferent navigation groups ant Klikshots entities!
Click to see some features!
The Ribbon panel is available on the top side of the application and there are grouped in tabs all the KlikShots actions. If it is hidden, click the down arrow in the top right-hand corner!
Click to see some features!
With Ribbon panel, you have different settings options. Typically, you can do the following:
- File actions (Save, export, print, etc...)
- Navigate through entities and change theme.
- Access to KlikShots special actions.
List View:
- The ListView UI element allows you to view or edit an objects collection
- The ListView UI element has many runtime customization capabilities
- Advanced filtering capabilities
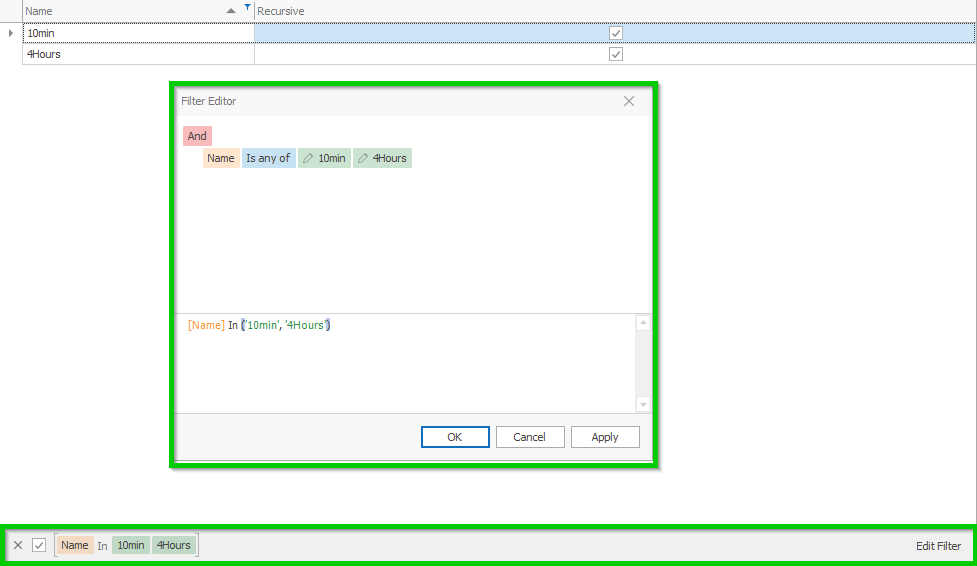
Filter Editor
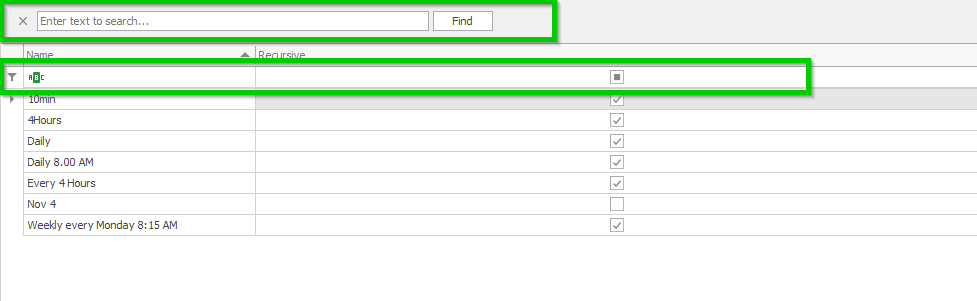
Find panel and Auto filter row
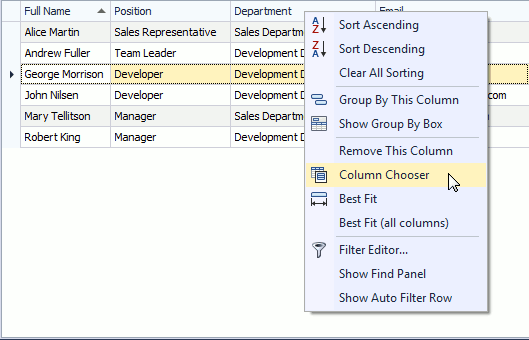
- You can modify the default configuration if it does not meet your requirements. Scale columns by dragging a separator between two column headers, or drag and drop column headers to re-arrange columns. You can hide a column by dragging it outside the table. You can also apply sorting, grouping, and filtering. To show hidden columns, right-click on the table header and select the Column Chooser!
Detail View:
- The Detail View UI element allows you to display a particular business object
- The DetailView UI element has many runtime customization capabilities
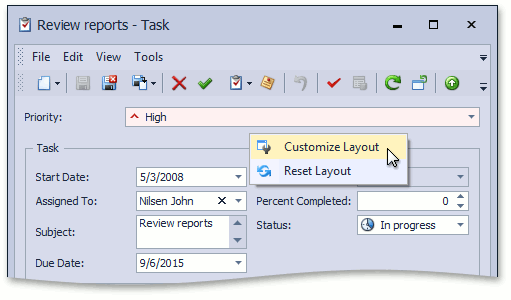
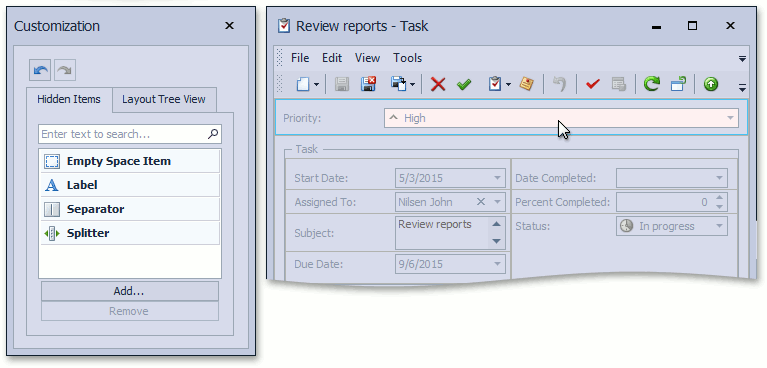
- In KlikShots you can customize the layout by using the Customization form invoked at runtime. To display this form, right-click on an empty space in the Detail View and select Customize Layout in the invoked context menu.
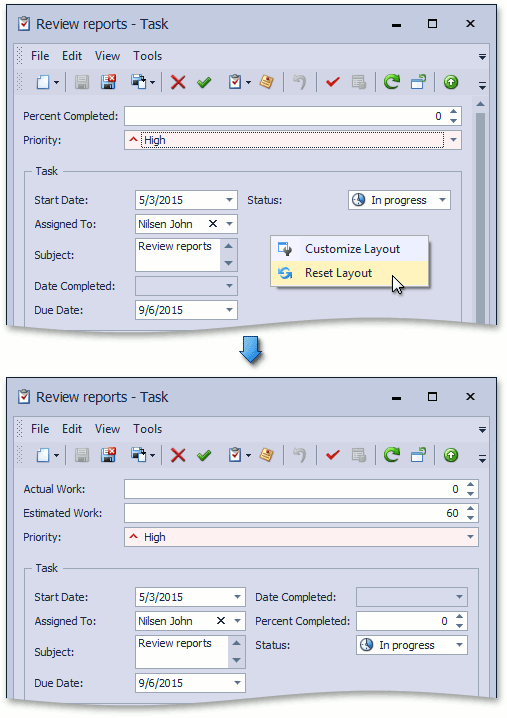
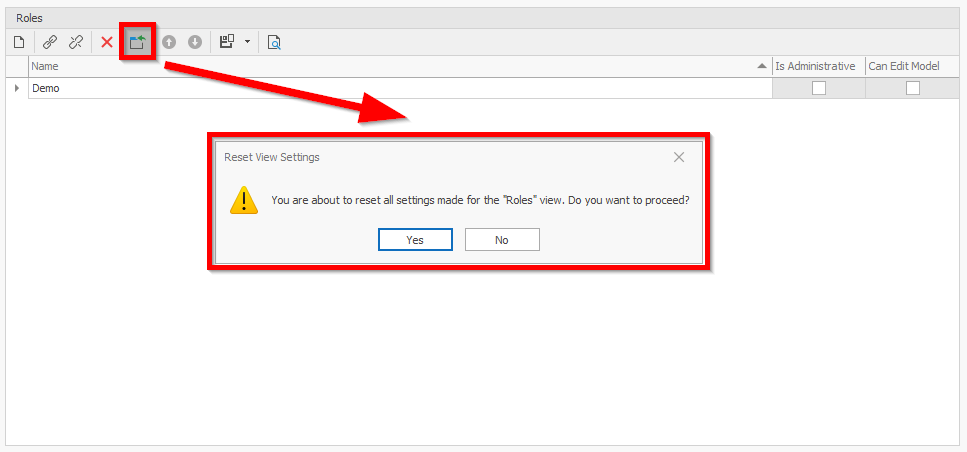
- The changes that you perform at runtime are saved to the Model.User.xafml. This means that the next time you invoke the customized View, its items will be arranged according to the most recent changes you made. If, however, you need to invoke the View in its pre-customization state, right-click on an empty space in the View at run-time, and select Reset Layout in the invoked context menu. Alternatively, you can use the ResetViewSettings Action
On Navigation Bar there are 4 navigation groups:
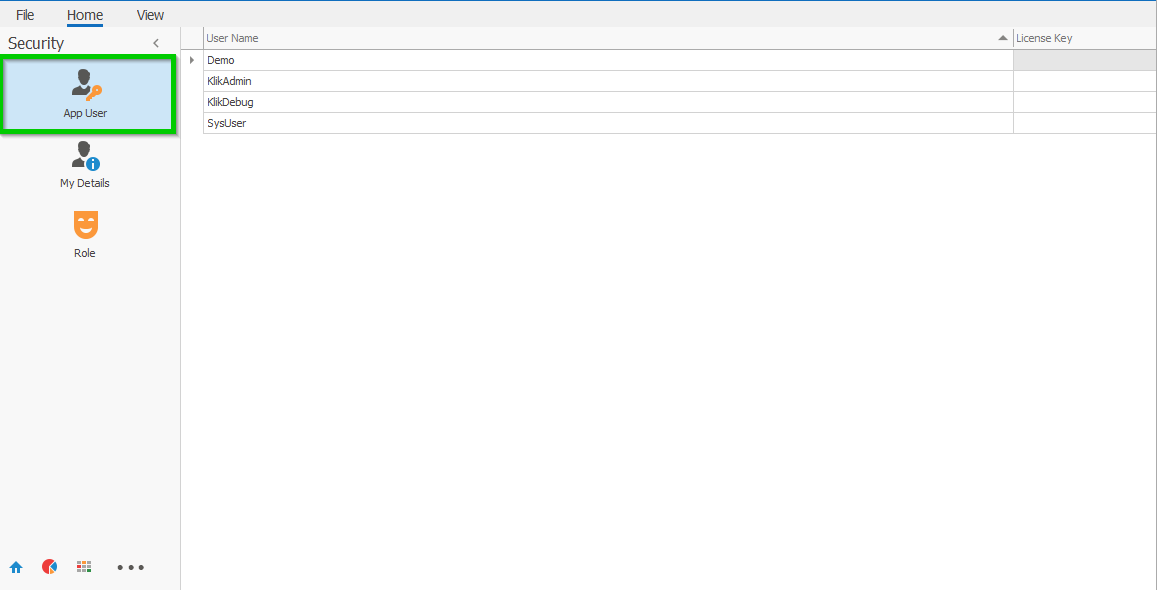
- Security
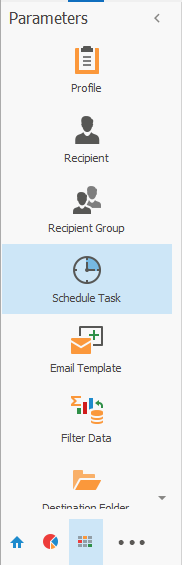
- Parameters
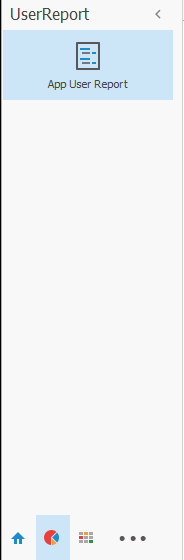
- User Reports
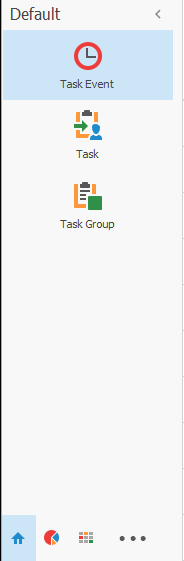
- Default
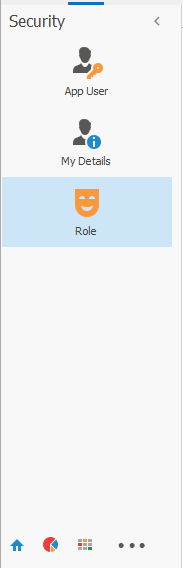
1. Security navigation group
App User
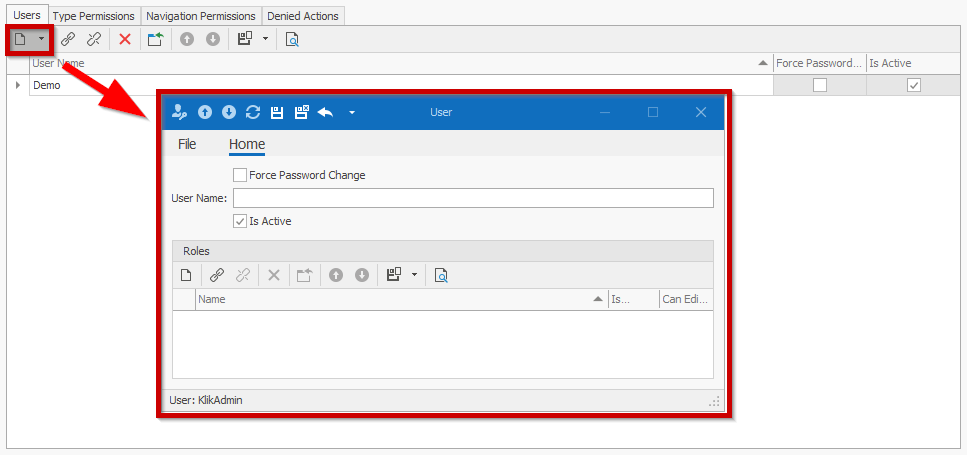
App User List View
App User Detail View
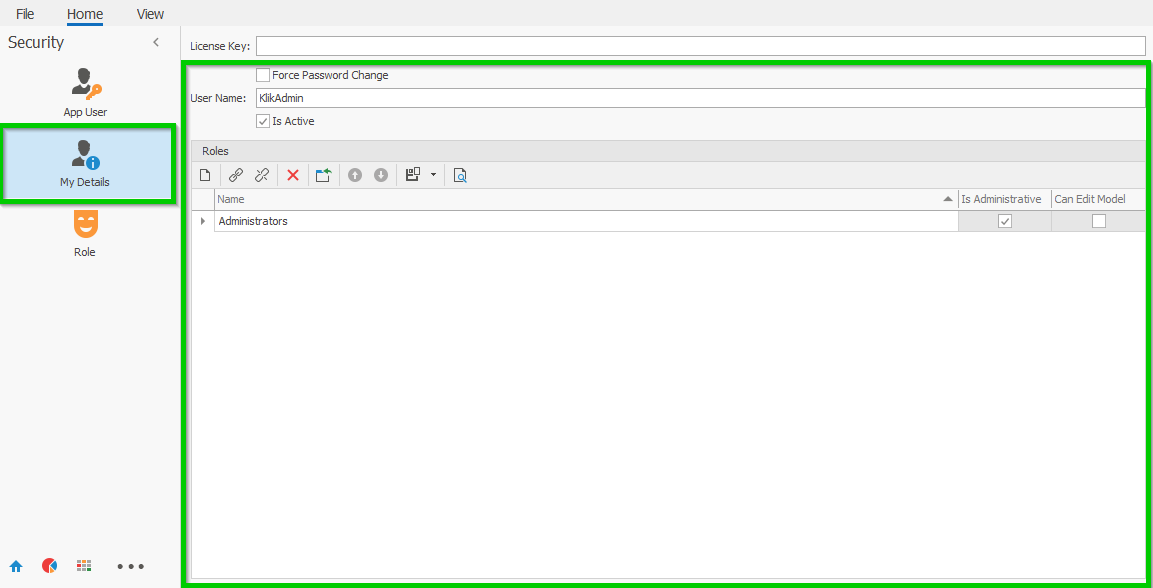
Force Password Change - Force user to change password on next login.
User Name - The name of the user.
Is Active - Check if the user is active to use applicatin features.
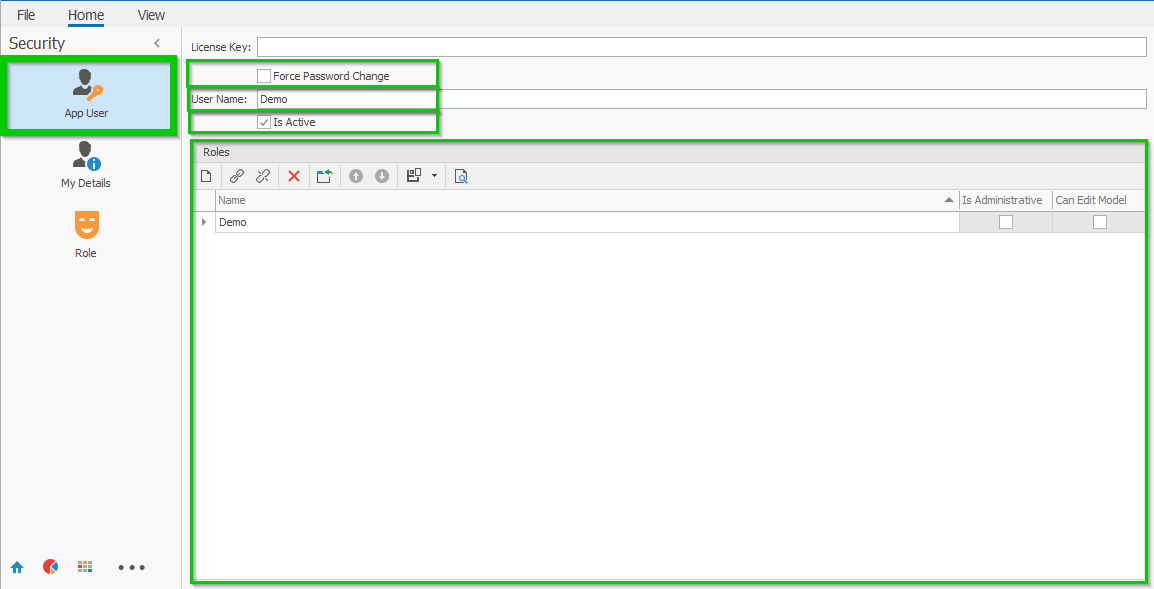
Roles - Add remove user to roles.

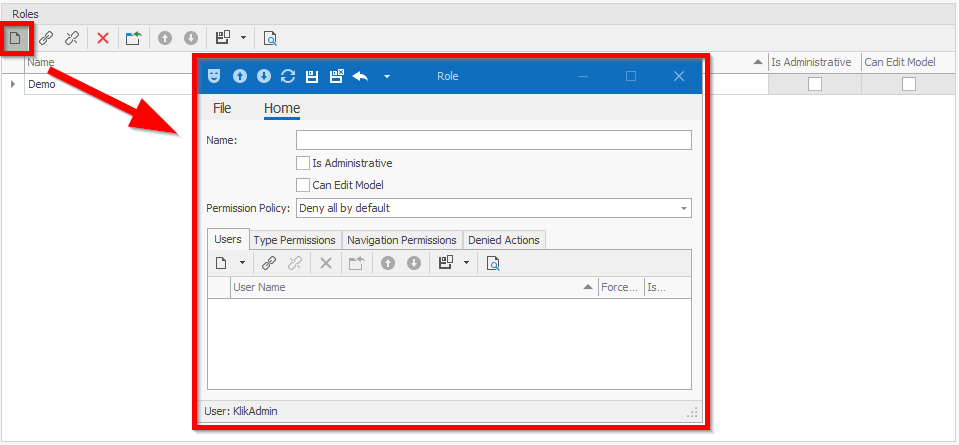
All sub list views in entities (like Roles in Users) have a default group of features.
1. New action - Adds a new record of the current entity and adds it to the current collection.
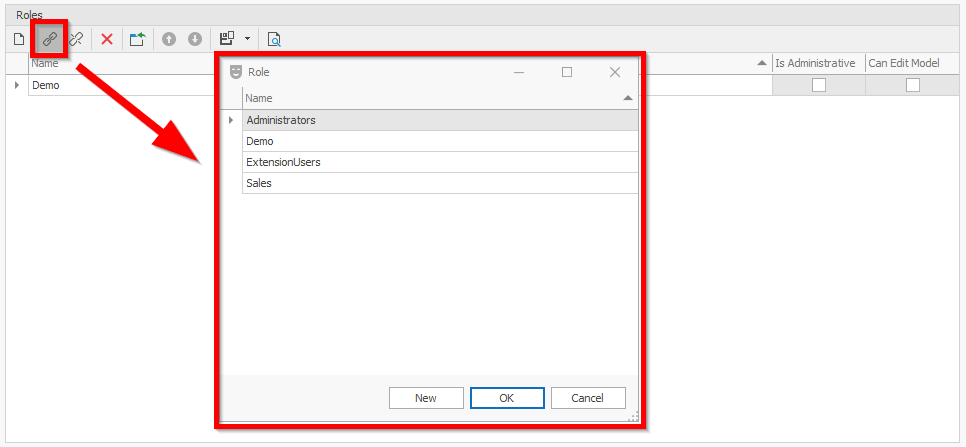
2. Link action - Links an existing record of the current entity and adds it to the current collection.
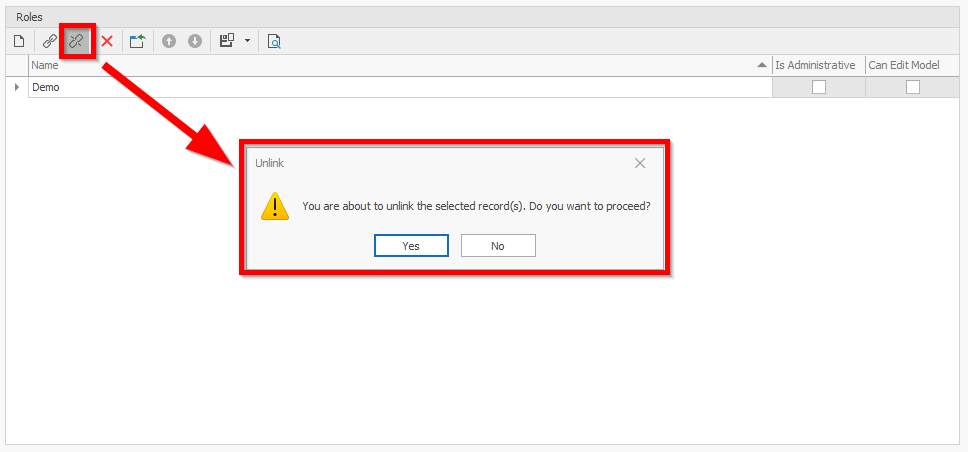
3. UnLink action - UnLinks an existing record of the current entity and remove it from the current collection.
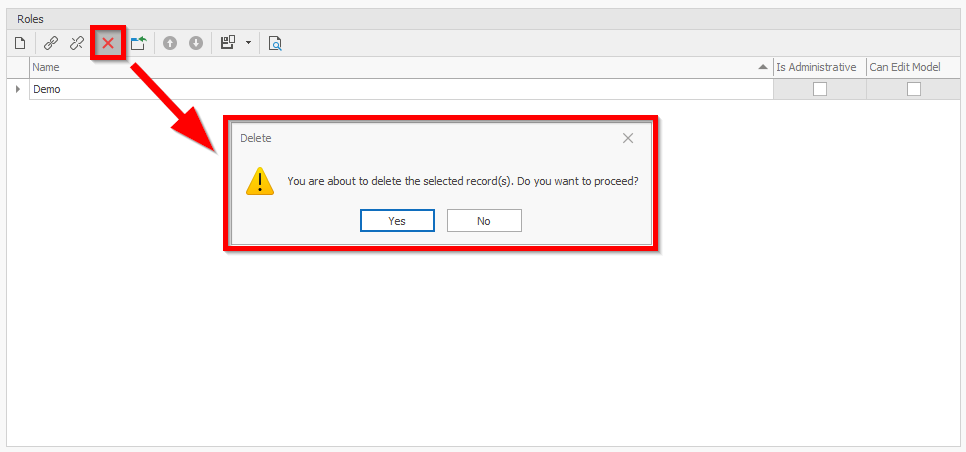
5. Delete action - Deletes an existing record of the current entity and remove it from the current collection.
6. Reset layout action - Resets current layout from any changes.
7. Prev record action - Position to the prev record on the list.
8. Next record action - Position to the next record on the list.
9. Export action - Exports current collection of entities.
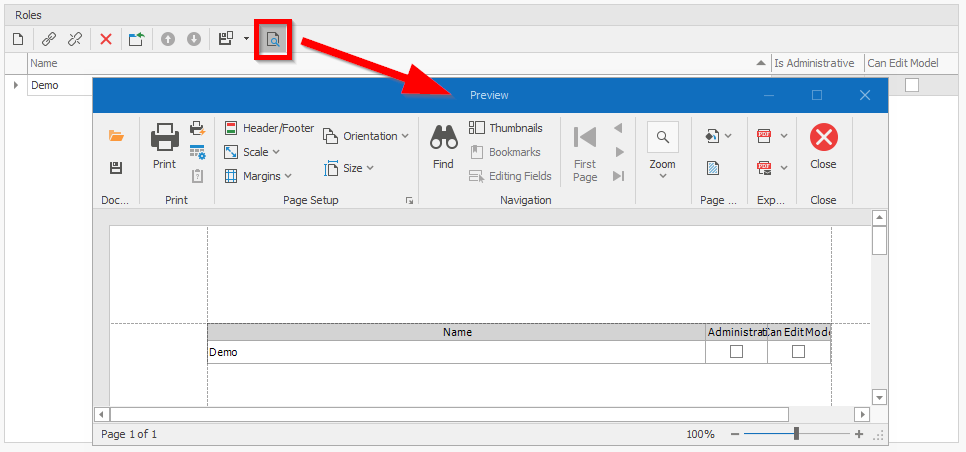
10. Preview action - Creates a preview of the current collection of entities.
-
My Details
My Details detail view contains the data of the current logged in user. The user can update his personal data only if has administrative rights.
Roles
Roles List View
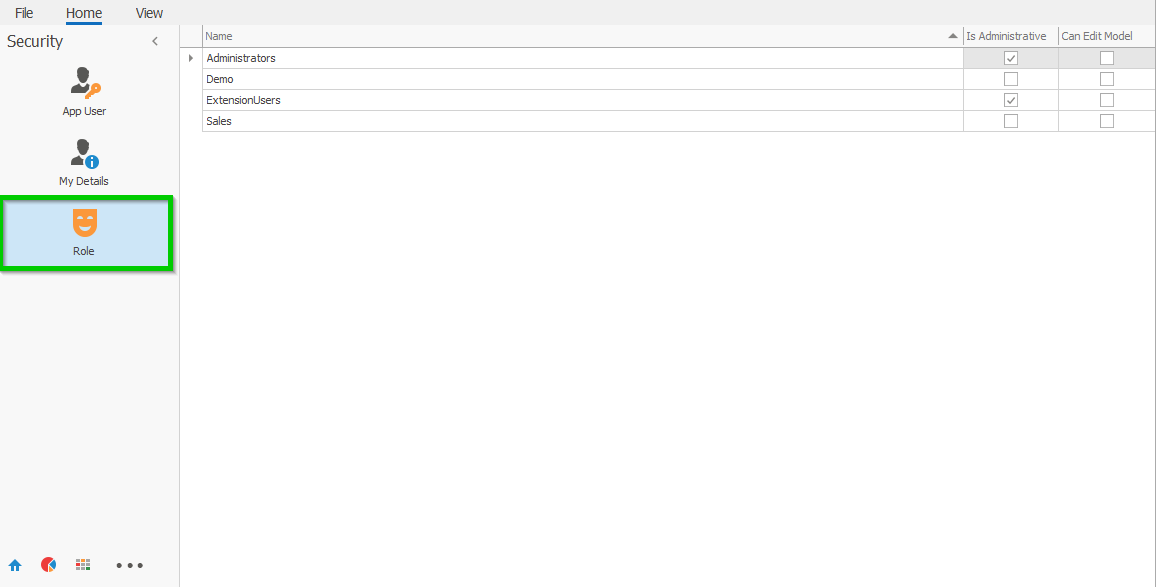
Roles Detail View
Name - The description of the role.
Is Administrative - Flag role as administrative.
Can Edit Model - Enable if current role can change application layout.
Permission Policy - Permission Policy can receive three values:
"Allow all by default" - All the users in this role would have all rights by default.
"Read only all by default" - All the users in this role would have only read rights by default.
"Deny all by default" - All the users in this role would have no rights by default.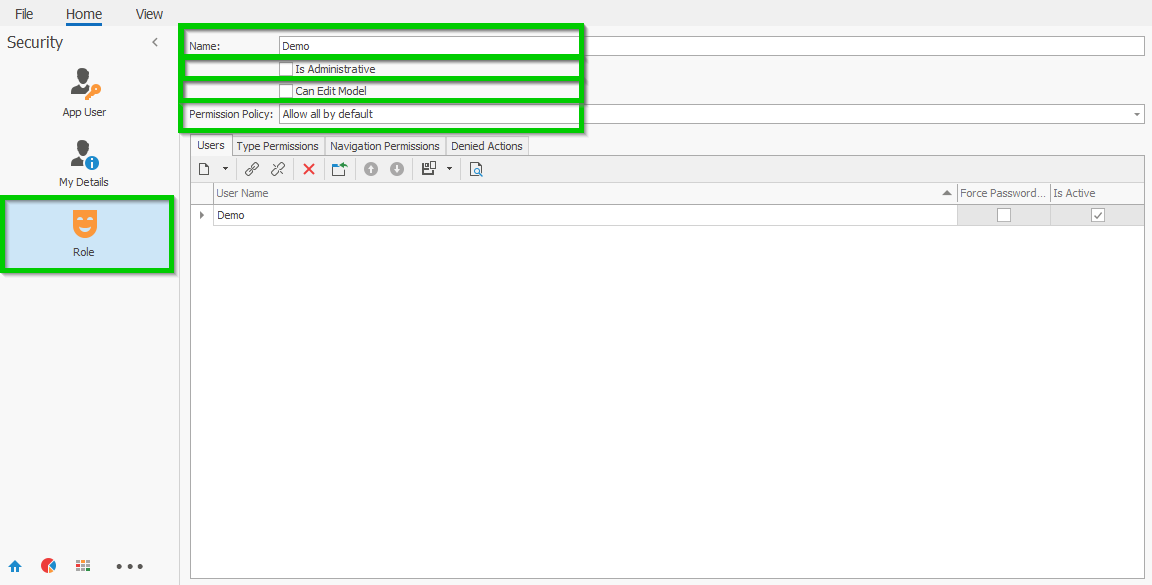
Roles - Collections.

1. Users - Add and remove users to the current Role.
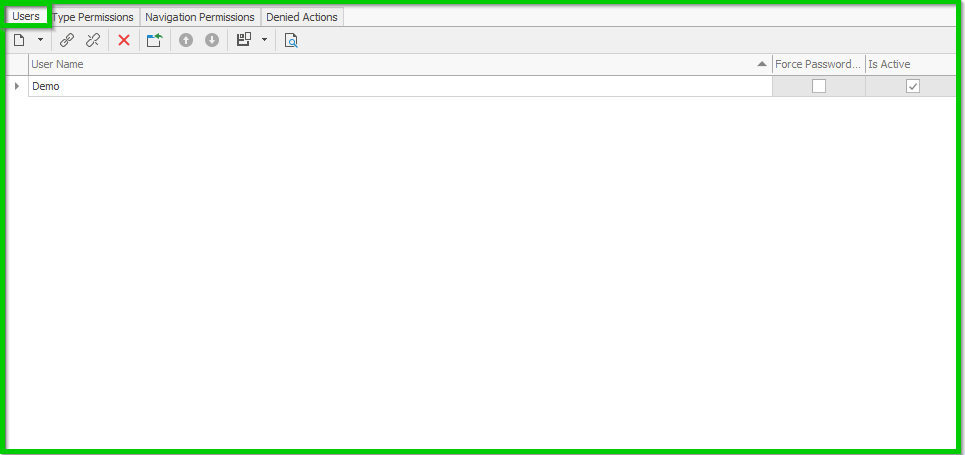
This action will add a new user in user collection for the current Role
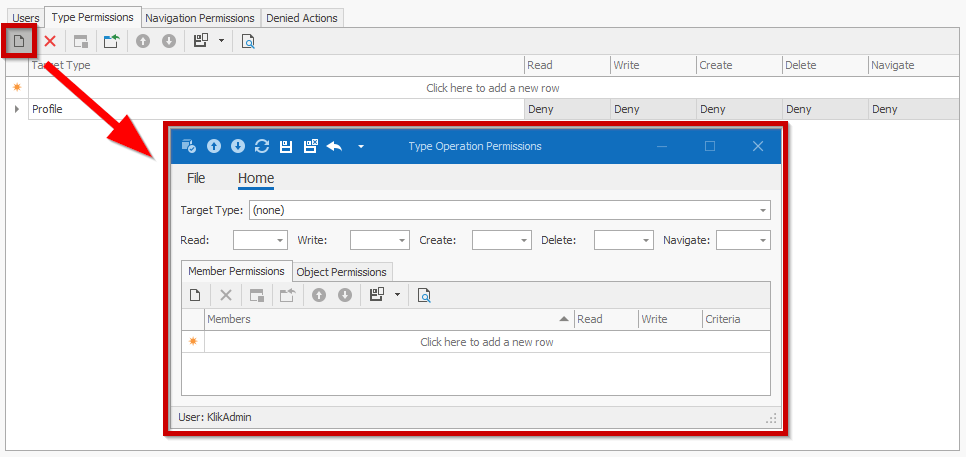
2. Type Permission - Add and remove types to the current Role.

This action will add a new type permission in type permissions collection for the current Role
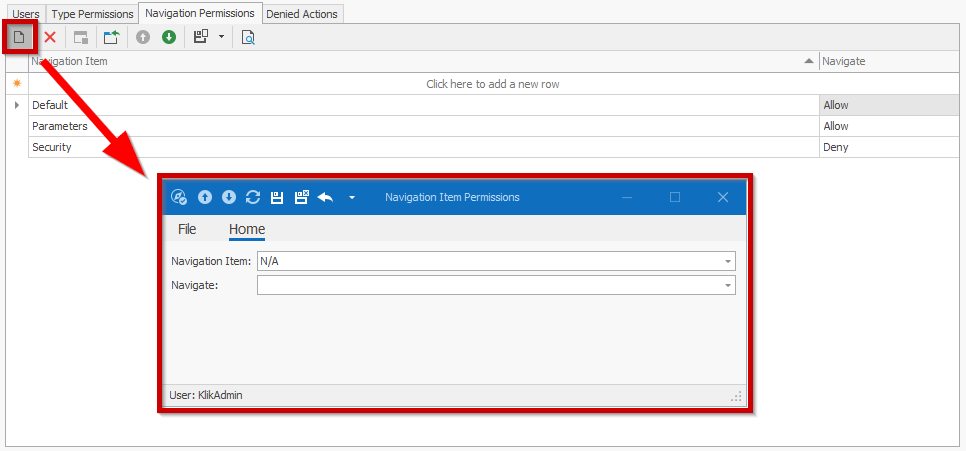
3. Navigation Permission - Add and remove navigation items to the current Role.
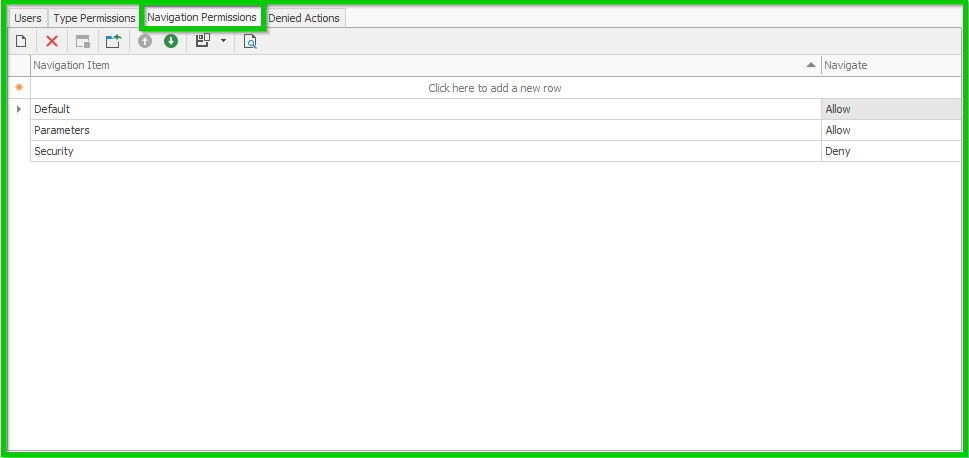
This action will link a new navigation in navigations collection for the current Role
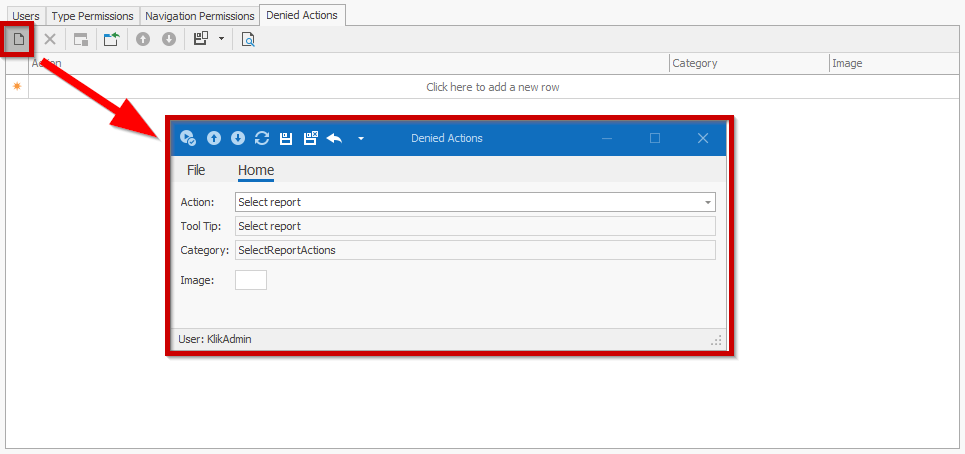
4. Denied Actions - Add and remove denied actions items to the current Role.
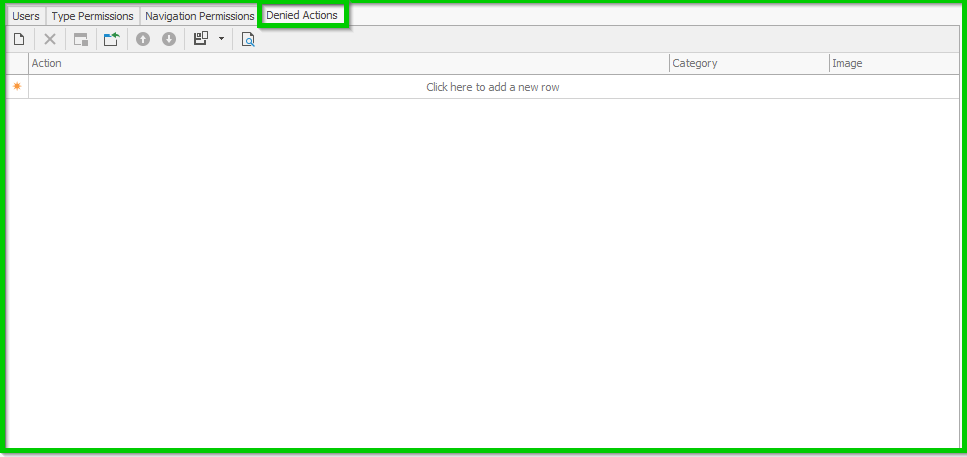
This action will link a new denied action in denied actions collection for the current Role
2. Parameters
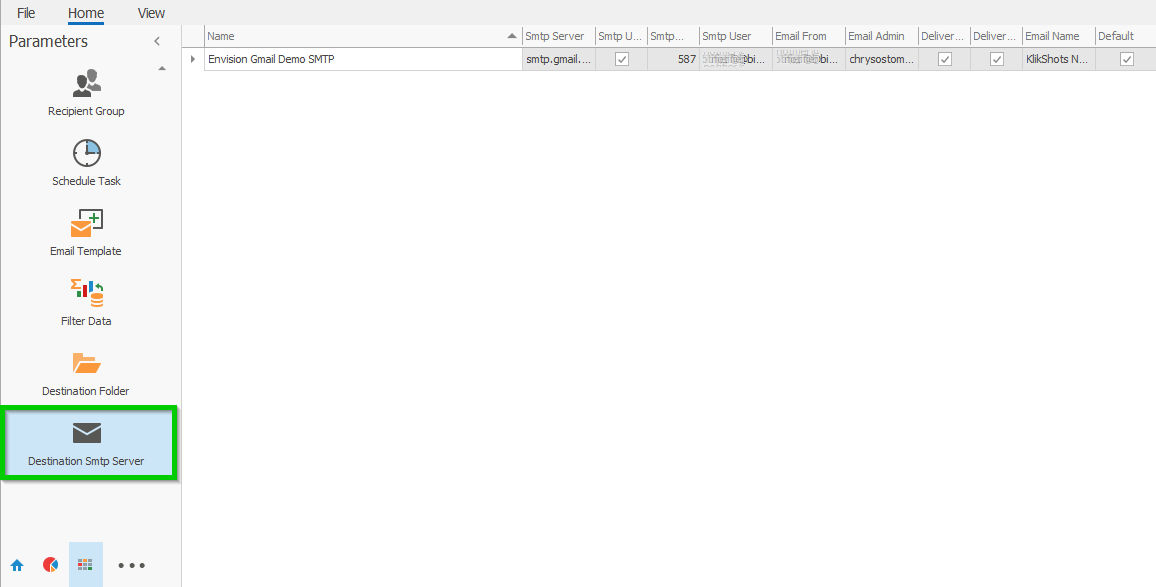
Destination SMTP Server
Destination SMTP Server List View
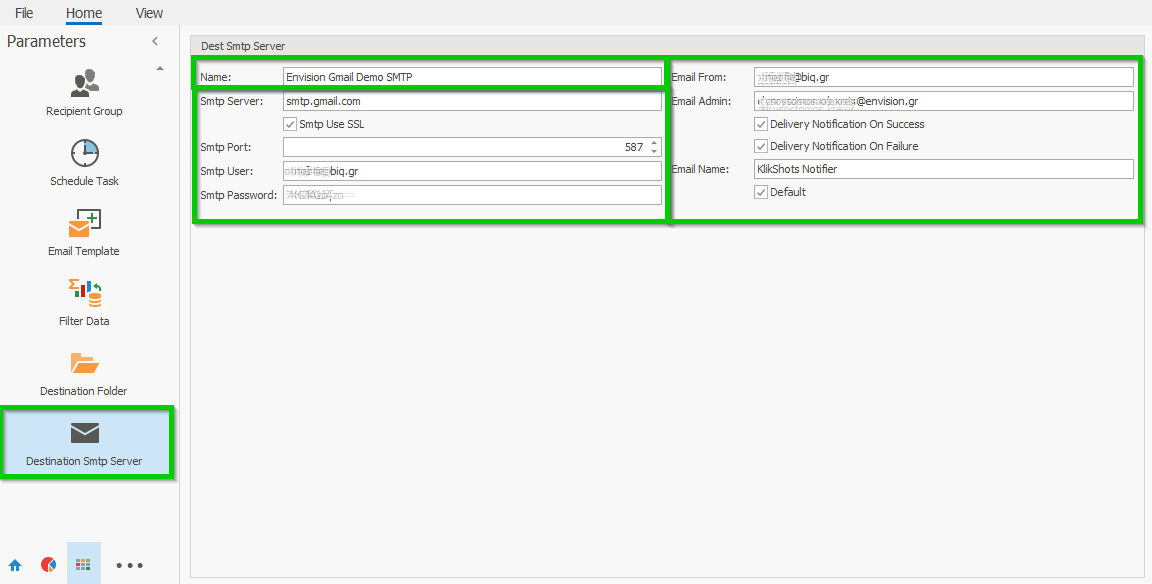
Destination SMTP Server Detail View
Name - The dedcription of SMPT server.
SMTP Server, Use SSL, Port, User, Password - Smpt server data.
Email from - The email account which is used as sender.
Email Admin - The email account to get notification about delivery.
Delivery Notification On Success - Send delivery notification email to Email Admin when an email delivery was successful. (Only for email clients tha supports this feature like Microsoft Outlook)
Delivery Notification On Failure - Send delivery notification email to Email Admin when an email delivery faild. (Only for email clients tha supports this feature like Microsoft Outlook)
Email Name - The name to show as sender.
Default - If checked this SMTP definition will be recommended in any new entity has SMPT requirements.
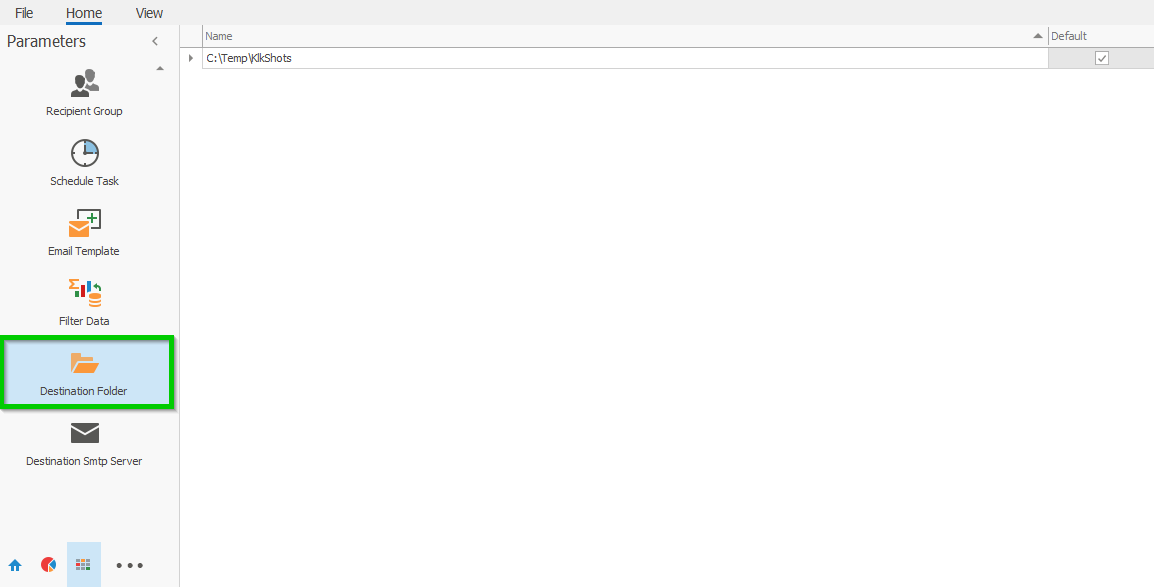
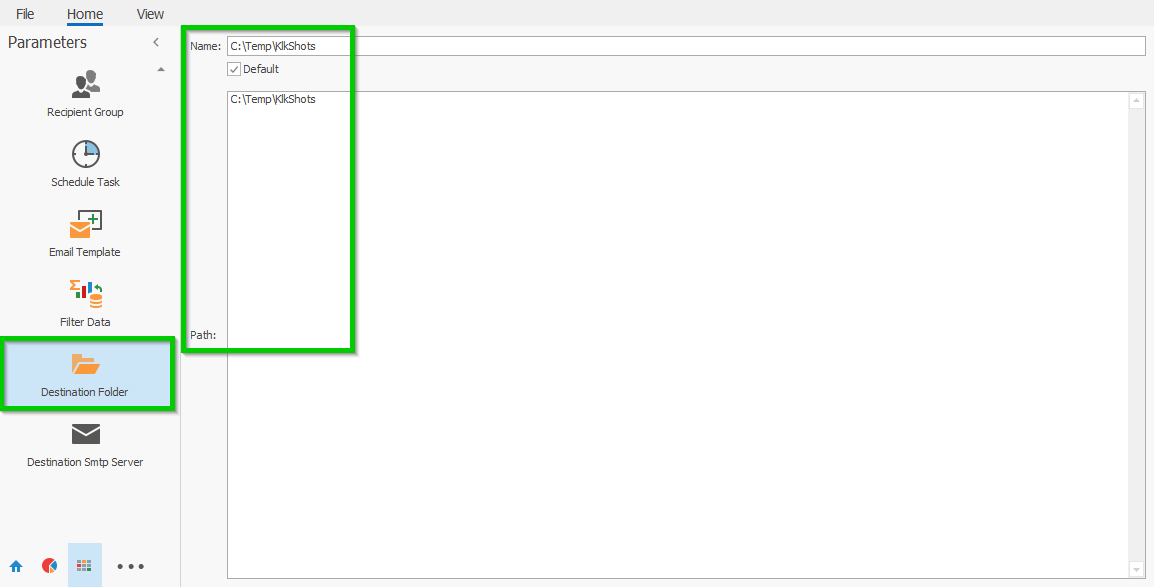
Destination Folder
Destination Folder List View
Destination Folder Detail View
Name - The description of Destination Folder.
Default - If checked this destination folder definition will be recommended in any new entity has destination folder requirements.
Path - The folder on disk where the reports will be exported.
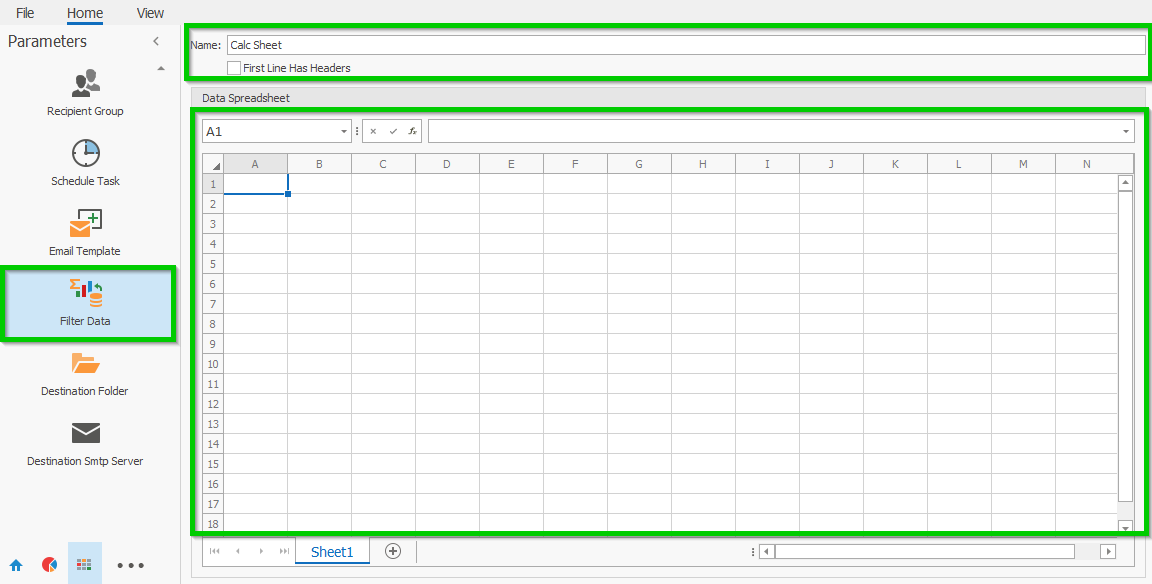
Filter Data
Filter Data List View
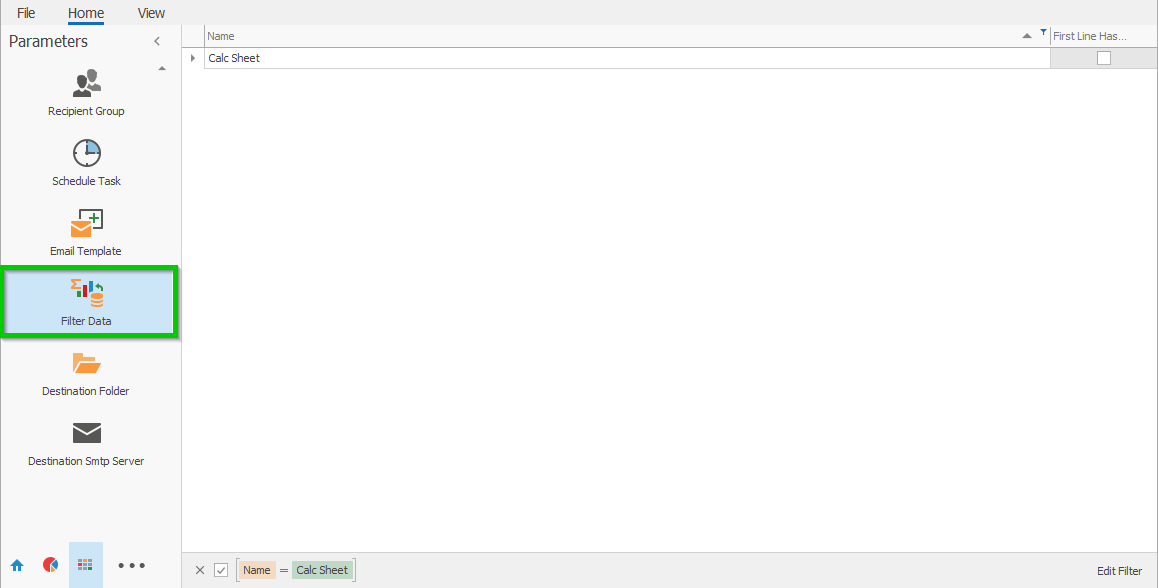
Filter Data Detail View
Name - The description of Filter Data.
First Line Has Headers - If checked the first row of the spreadsheet will be understood as column name in the produced data set.
Data Spreadsheet - A spreadsheet intended to be used as datasource on the KlikShots report engine.
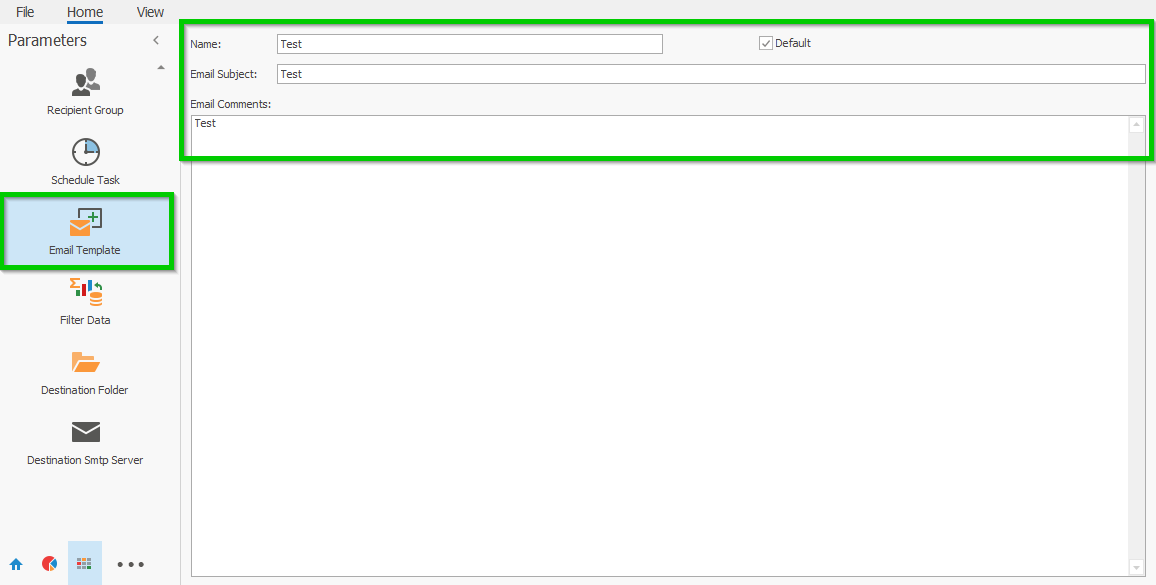
Email Template
Email Template List View
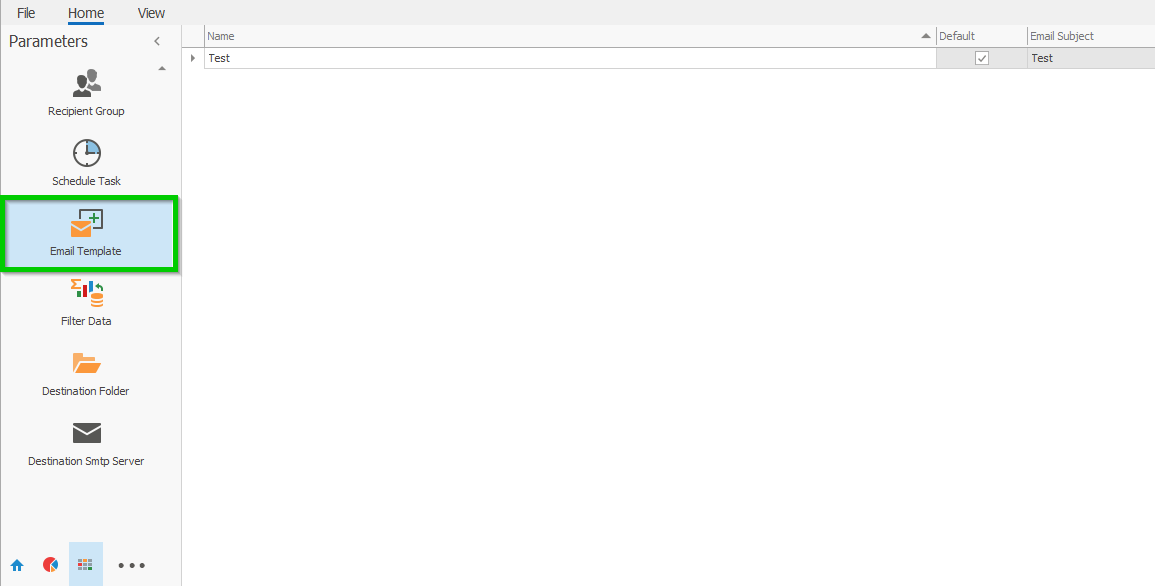
Email Template Detail View
Name - The description of the Email Template.
Default - If checked this Email Template definition will be recommended in any new entity has Email Template requirements.
Email Subject - Τhis text will be used as a subject in the email that the system will send.
Email Comments - Τhis text will be used as a body in the email that the system will send.
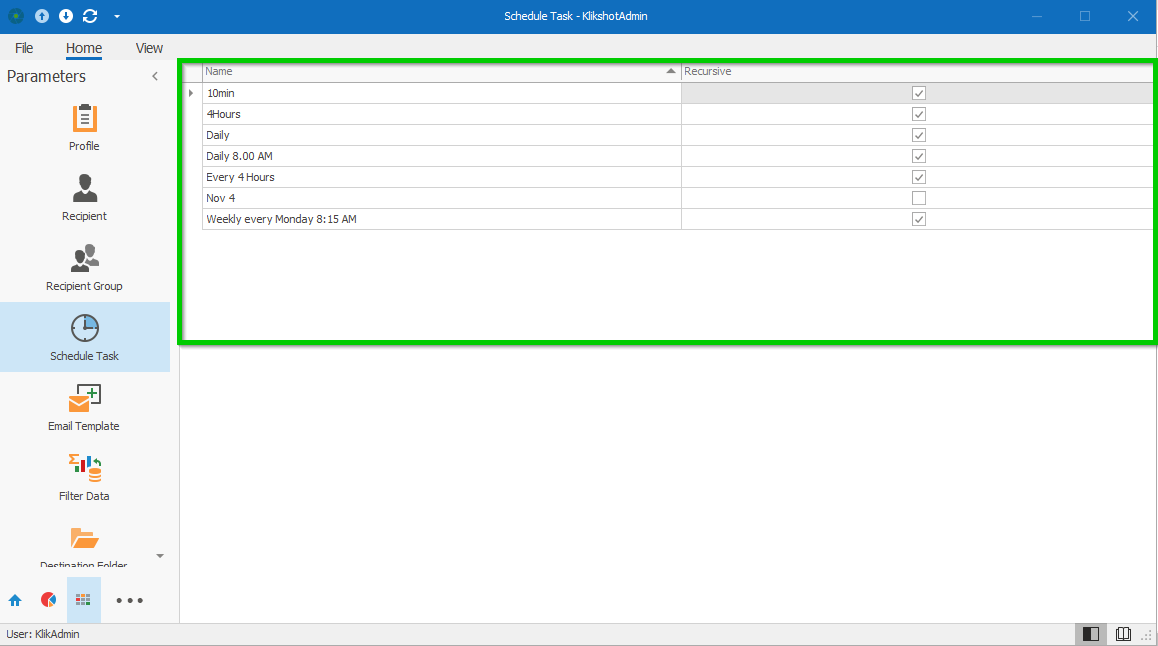
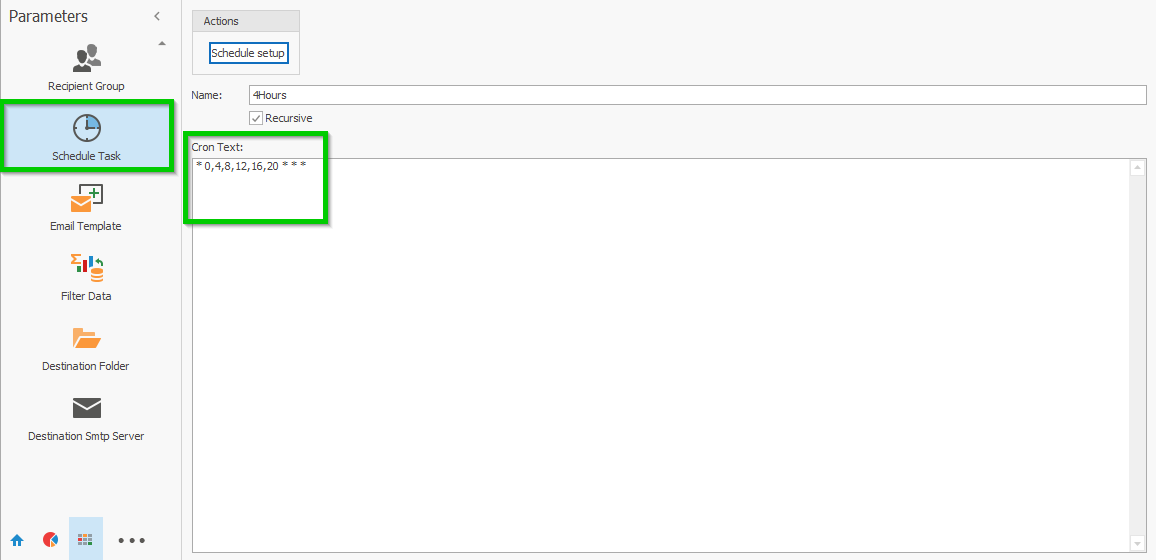
Schedule Task
Schedule Task List View
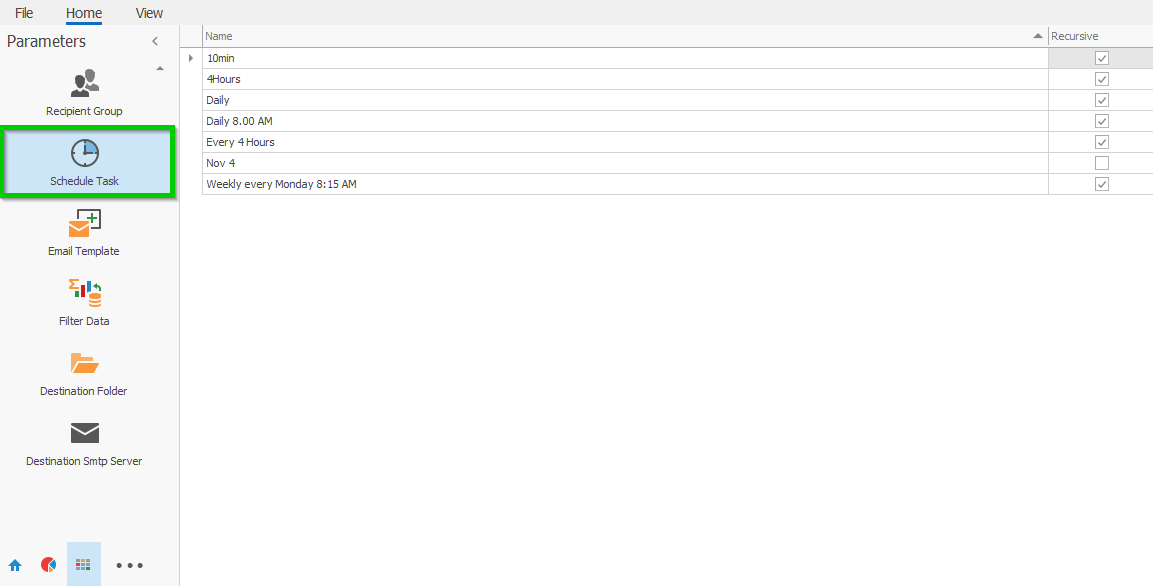
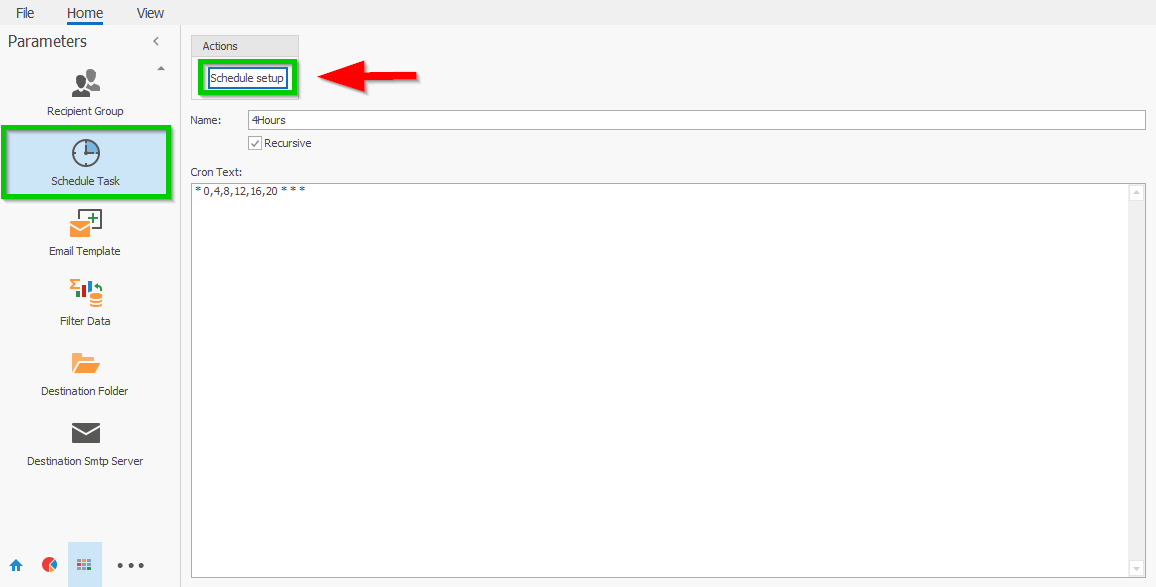
Schedule Task Detail View
Name - The description of the Schedule Task.
Recursive - If checked will trigger all task using this definition to repeat itself indefinitely in the given times.
Cron Text - Τhis describes Cron expressions as human readable text.
Format
A cron expression is a string comprised of 6 or 7 fields separated by white space. Fields can contain any of the allowed values, along with various combinations of the allowed special characters for that field. The fields are as follows:
Field Name Mandatory Allowed Values Allowed Special Characters Seconds YES 0-59 , - * / Minutes YES 0-59 , - * / Hours YES 0-23 , - * / Day of month YES 1-31 , - * ? / L W Month YES 1-12 or JAN-DEC , - * / Day of week YES 1-7 or SUN-SAT , - * ? / L # Year NO empty, 1970-2099 , - * / So cron expressions can be as simple as this:
* * * * ? *or more complex, like this:
0/5 14,18,3-39,52 * ? JAN,MAR,SEP MON-FRI 2002-2010#Special characters
*("all values") - used to select all values within a field. For example,*in the minute field means "every minute".?("no specific value") - useful when you need to specify something in one of the two fields in which the character is allowed, but not the other. For example, if I want my trigger to fire on a particular day of the month (say, the 10th), but don't care what day of the week that happens to be, I would put10in the day-of-month field, and?in the day-of-week field. See the examples below for clarification.-- used to specify ranges. For example,10-12in the hour field means "the hours 10, 11 and 12".,- used to specify additional values. For example,MON,WED,FRIin the day-of-week field means "the days Monday, Wednesday, and Friday"./- used to specify increments. For example,0/15in the seconds field means "the seconds 0, 15, 30, and 45". And5/15in the seconds field means "the seconds 5, 20, 35, and 50". You can also specify/after the "character - in this case" is equivalent to having '0' before the '/'.1/3in the day-of-month field means "fire every 3 days starting on the first day of the month".L("last") - has different meaning in each of the two fields in which it is allowed. For example, the valueLin the day-of-month field means "the last day of the month" - day 31 for January, day 28 for February on non-leap years. If used in the day-of-week field by itself, it simply means "7" or "SAT". But if used in the day-of-week field after another value, it means "the last xxx day of the month" - for example6Lmeans "the last friday of the month". You can also specify an offset from the last day of the month, such asL-3which would mean the third-to-last day of the calendar month. When using theLoption, it is important not to specify lists, or ranges of values, as you'll get confusing/unexpected results.W("weekday") - used to specify the weekday (Monday-Friday) nearest the given day. As an example, if you were to specify15Was the value for the day-of-month field, the meaning is: "the nearest weekday to the 15th of the month". So if the 15th is a Saturday, the trigger will fire on Friday the 14th. If the 15th is a Sunday, the trigger will fire on Monday the 16th. If the 15th is a Tuesday, then it will fire on Tuesday the 15th. However if you specify1Was the value for day-of-month, and the 1st is a Saturday, the trigger will fire on Monday the 3rd, as it will not 'jump' over the boundary of a month's days. TheWcharacter can only be specified when the day-of-month is a single day, not a range or list of days.
TIP
The
LandWcharacters can also be combined in the day-of-month field to yieldLW, which translates to *"last weekday of the month".#- used to specify "the nth" XXX day of the month. For example, the value of6#3in the day-of-week field means "the third Friday of the month" (day 6 = Friday and "#3" = the 3rd one in the month). Other examples:2#1= the first Monday of the month and4#5= the fifth Wednesday of the month. Note that if you specify#5and there is not 5 of the given day-of-week in the month, then no firing will occur that month.
TIP
The legal characters and the names of months and days of the week are not case sensitive. MON is the same as mon.
#Examples
Here are some full examples:
Expression Meaning 0 0 12 * * ? Fire at 12pm (noon) every day 0 15 10 ? * * Fire at 10:15am every day 0 15 10 * * ? Fire at 10:15am every day 0 15 10 * * ? * Fire at 10:15am every day 0 15 10 * * ? 2005 Fire at 10:15am every day during the year 2005 0 * 14 * * ? Fire every minute starting at 2pm and ending at 2:59pm, every day 0 0/5 14 * * ? Fire every 5 minutes starting at 2pm and ending at 2:55pm, every day 0 0/5 14,18 * * ? Fire every 5 minutes starting at 2pm and ending at 2:55pm, AND fire every 5 minutes starting at 6pm and ending at 6:55pm, every day 0 0-5 14 * * ? Fire every minute starting at 2pm and ending at 2:05pm, every day 0 10,44 14 ? 3 WED Fire at 2:10pm and at 2:44pm every Wednesday in the month of March. 0 15 10 ? * MON-FRI Fire at 10:15am every Monday, Tuesday, Wednesday, Thursday and Friday 0 15 10 15 * ? Fire at 10:15am on the 15th day of every month 0 15 10 L * ? Fire at 10:15am on the last day of every month 0 15 10 L-2 * ? Fire at 10:15am on the 2nd-to-last last day of every month 0 15 10 ? * 6L Fire at 10:15am on the last Friday of every month 0 15 10 ? * 6L Fire at 10:15am on the last Friday of every month 0 15 10 ? * 6L 2002-2005 Fire at 10:15am on every last friday of every month during the years 2002, 2003, 2004 and 2005 0 15 10 ? * 6#3 Fire at 10:15am on the third Friday of every month 0 0 12 1/5 * ? Fire at 12pm (noon) every 5 days every month, starting on the first day of the month. 0 11 11 11 11 ? Fire every November 11th at 11:11am. TIP
Pay attention to the effects of '?' and '*' in the day-of-week and day-of-month fields!
#Notes
WARNING
Support for specifying both a day-of-week and a day-of-month value is not complete (you must currently use the '?' character in one of these fields).

Schedule Setup Action - With this action we open a UI helper form in order to set the time in which the task will be carried out.
We have five lisboxes, Minutes, Hours, Days, Months and Weekdays. As we click on each element of those listboxes the system produces a Cron Text automatically and also calculates the next excution time based on your selections.
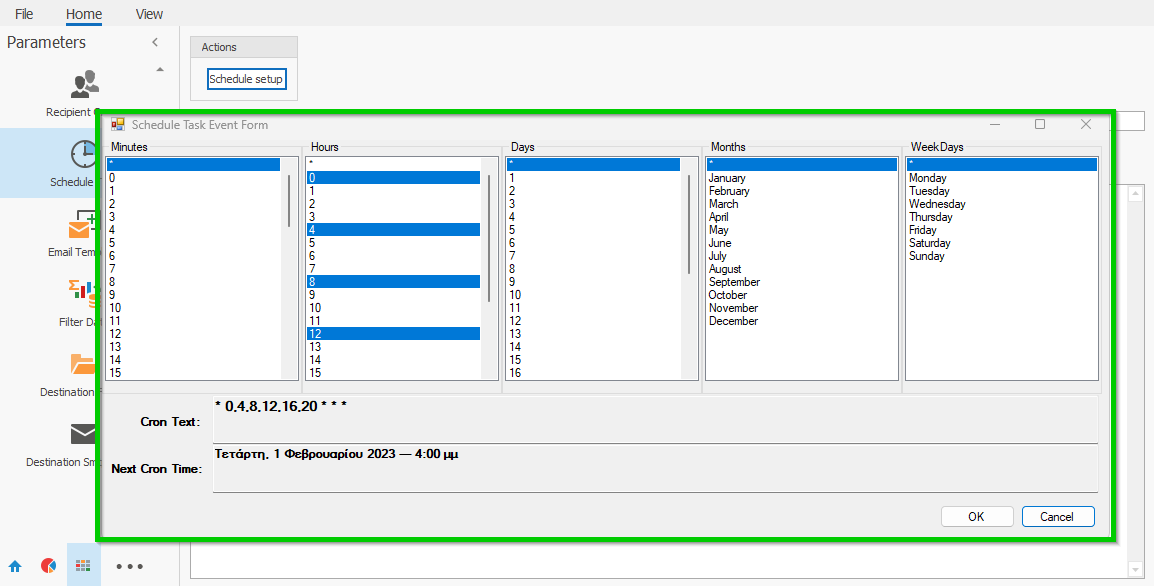
When the appropriate choices for the desired time have been made, then by pressing button "OK" the produced cron text will be transfered in the Schedule Task DetailView and in field Cron Text.
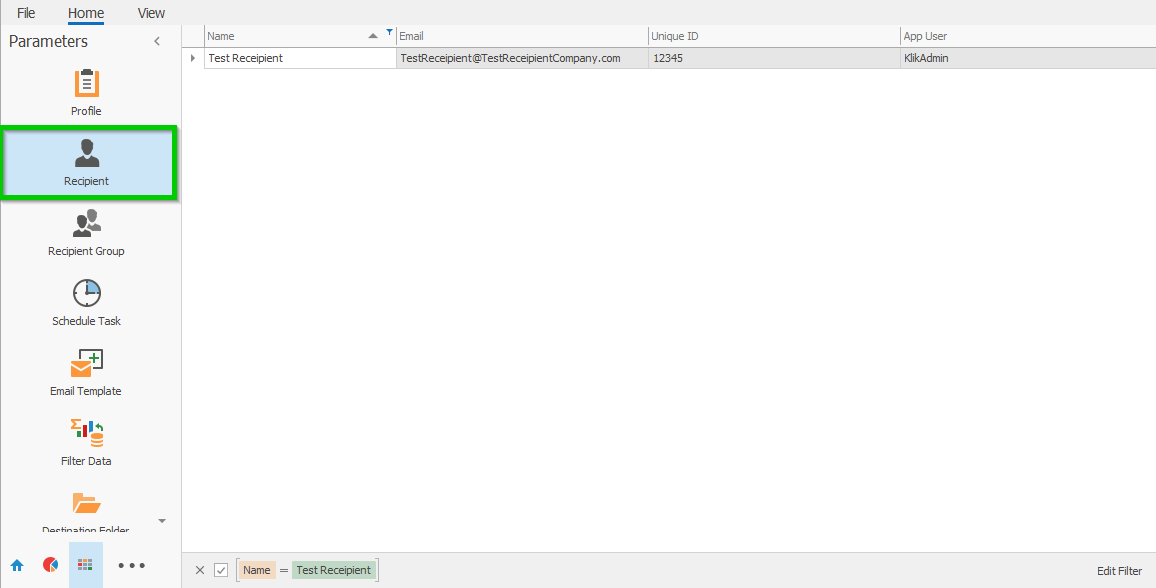
Recipient
Recipient List View
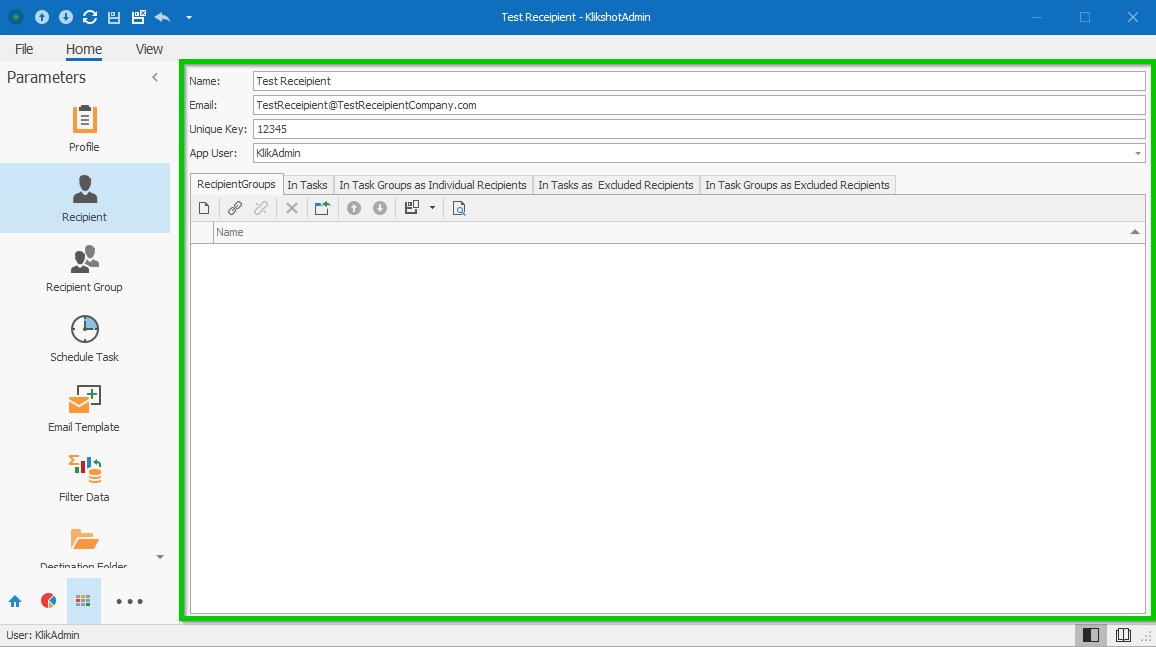
Recipient Detail View
Name - The Recipient's description.
Email - The Recipient's Email.
Unique Key - The Recipient's Unique Key.
App User - If the Recipient is KlikShots user at the same time.
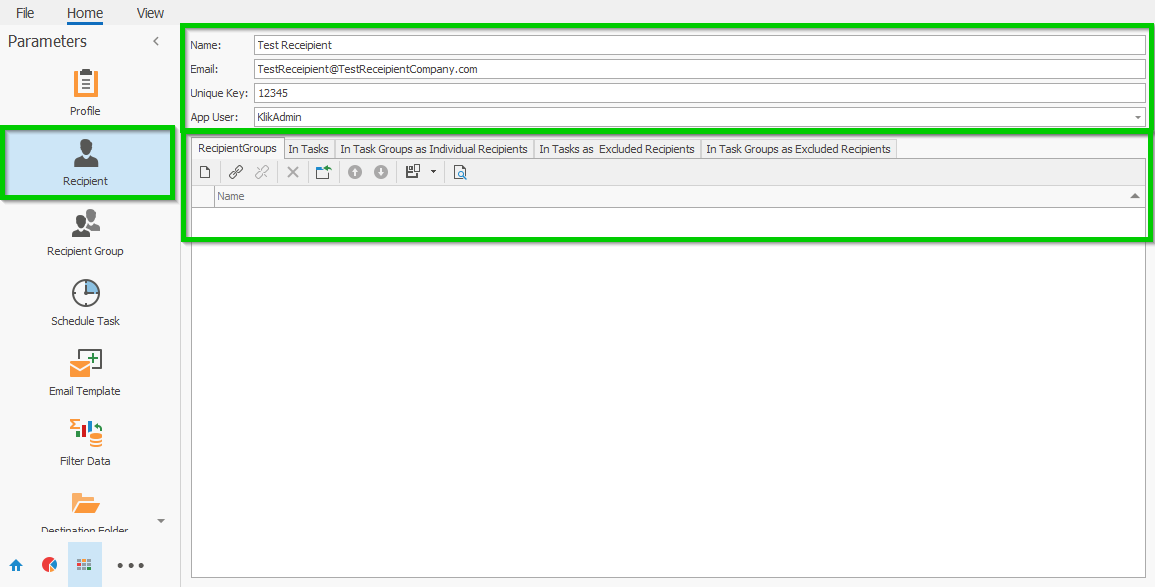
There are several informational list views like
"Recipient's Group" the Task Group collections for this Recipient
"In Task" the task collections for this Recipient
"In Task Group as individual Recipients" the Task Group as individual Recipients collections for this Recipient
"In Task as excluded Recipients" the Task as excluded Recipients collections for this Recipient
"In Task Group as excluded Recipients" the Task Group as excluded Recipients collections for this Recipient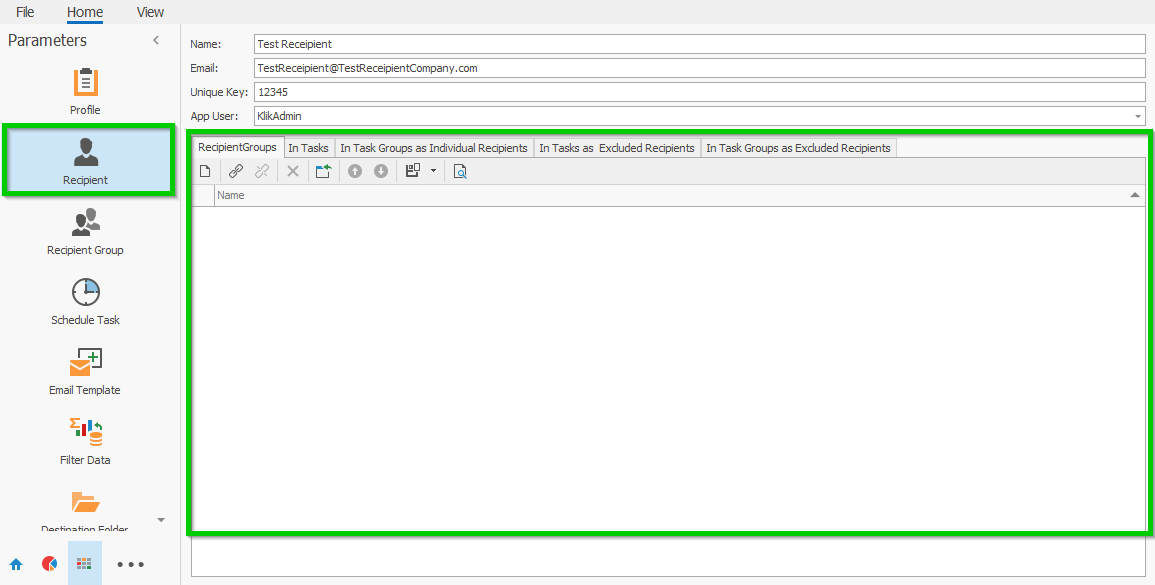
Recipient Group
Recipient Group List View
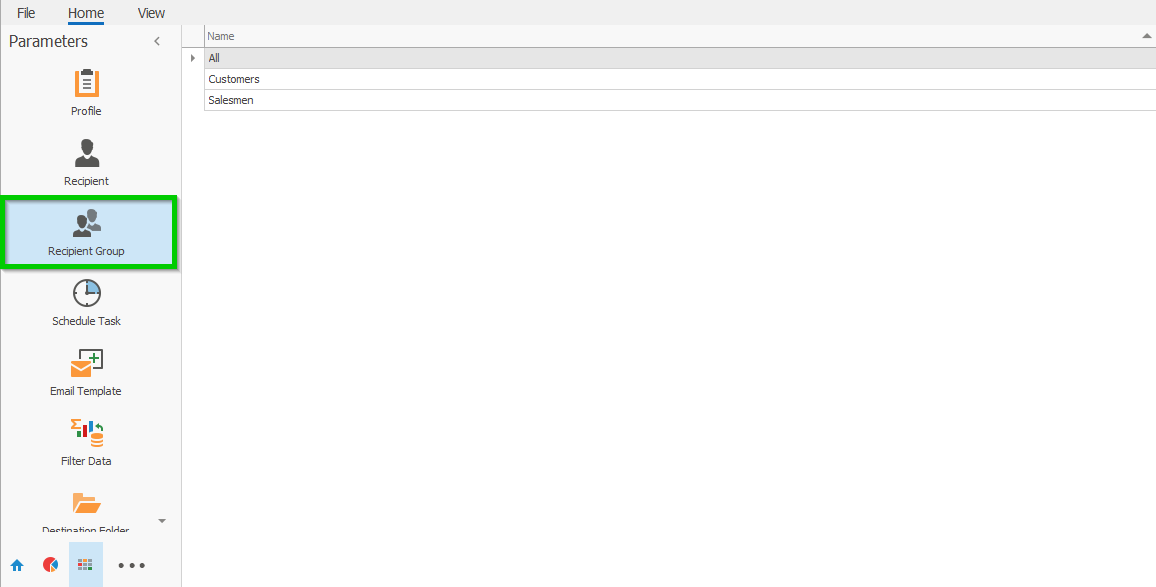
Recipient Group Detail View
Name - The Recipient Group description.
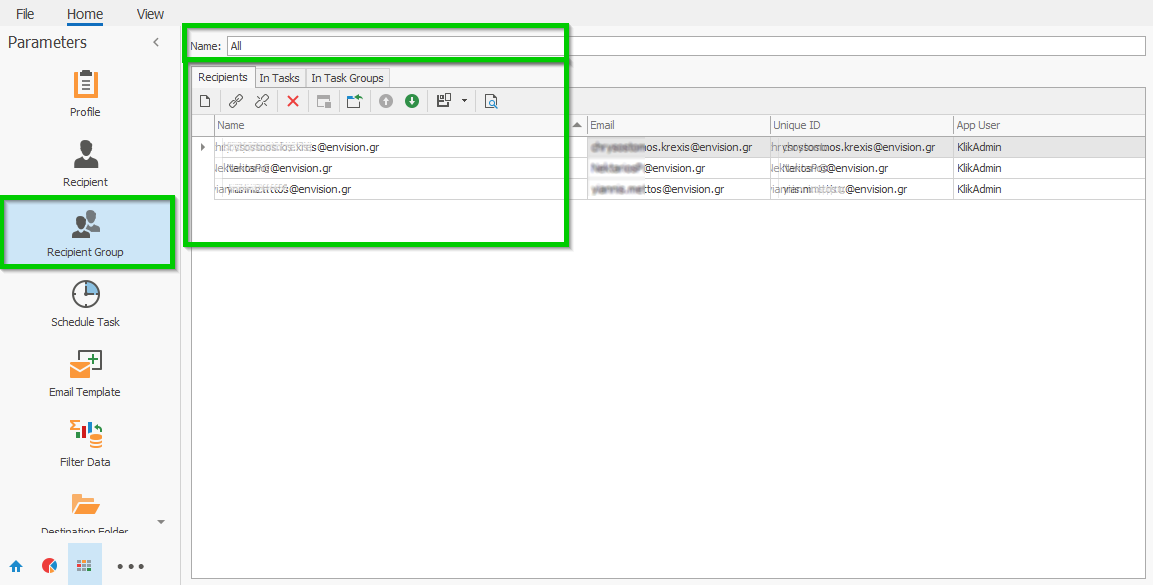
There are several list views like
"Recipients" the Recipient collections for this Recipient Group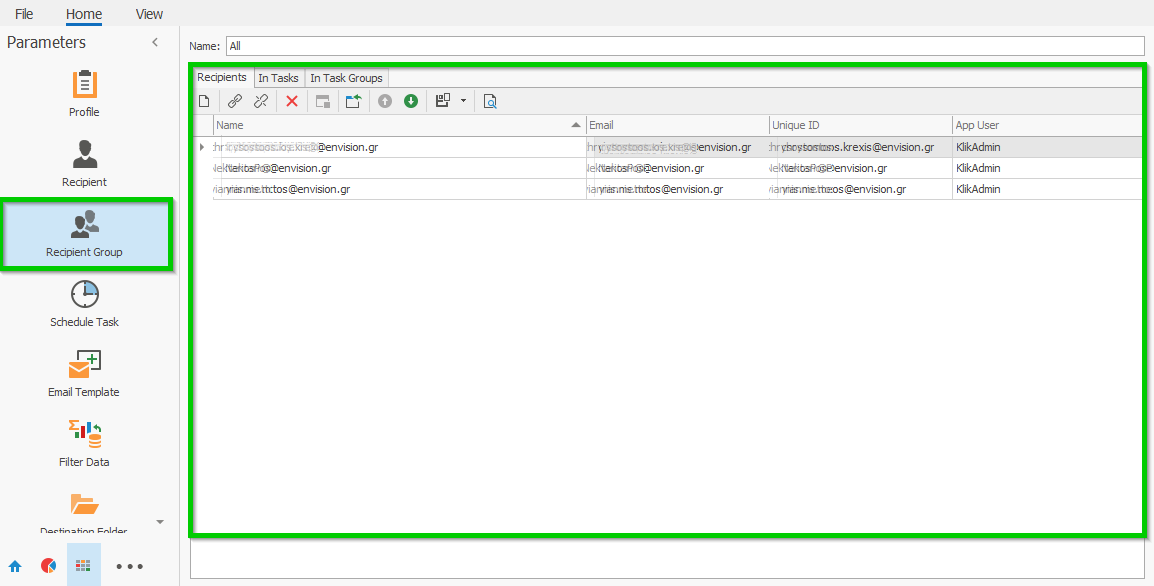
"In Task" the task collections for this Recipient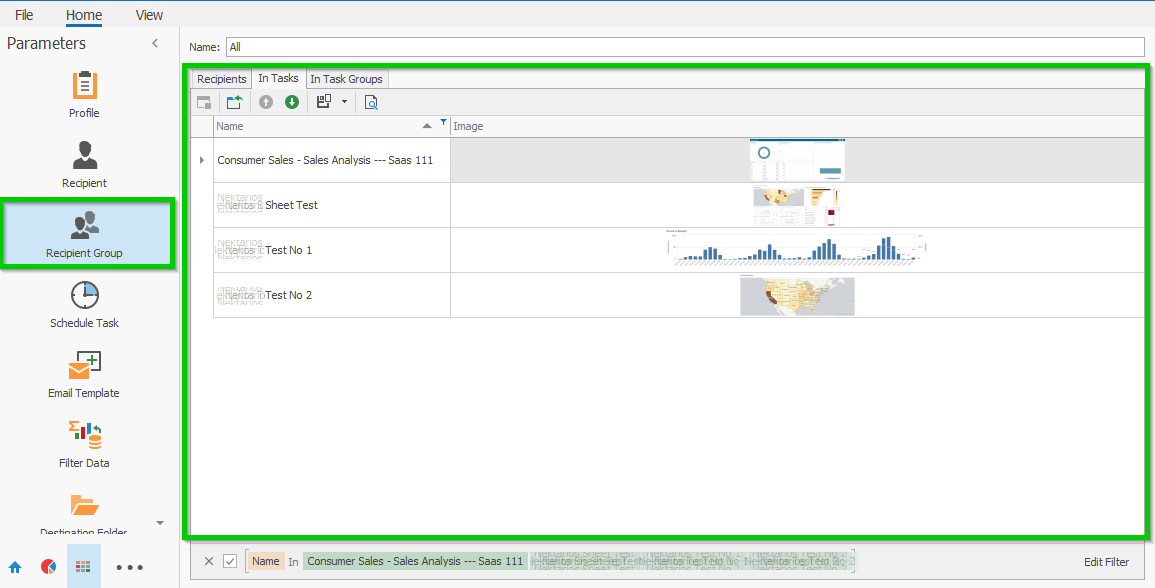
"In Task Group" the Task Groups collections for this Recipient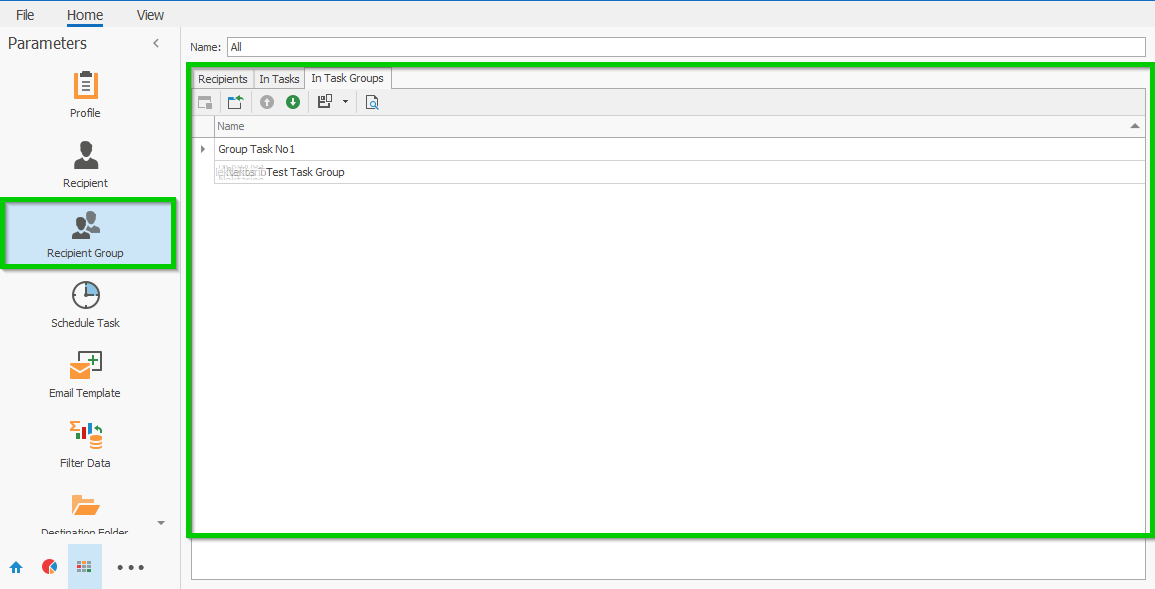
Profile
Profile List View
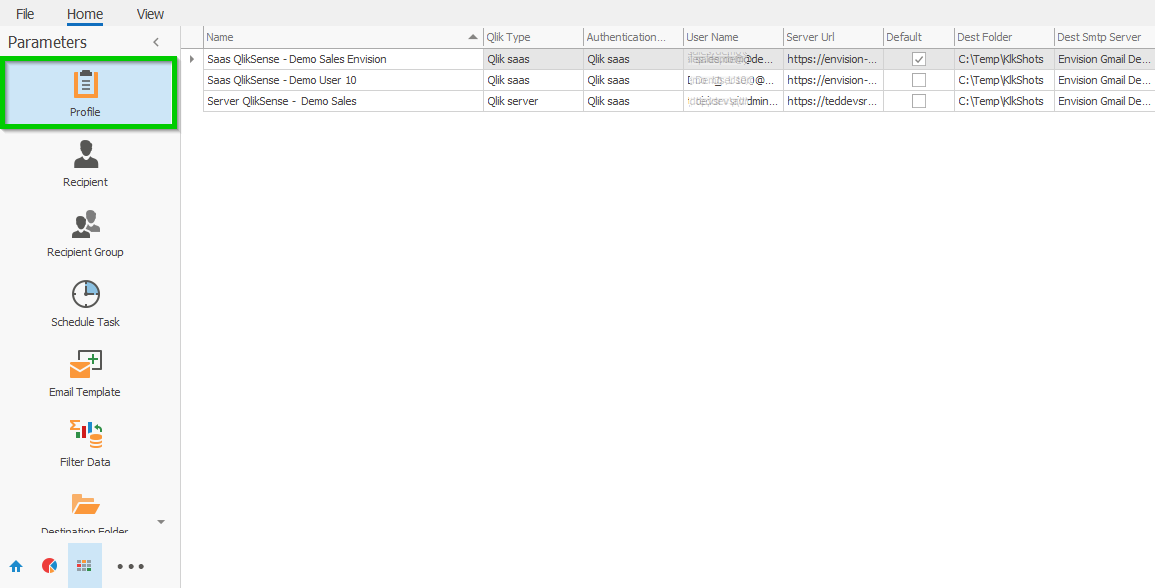
Profile Detail View
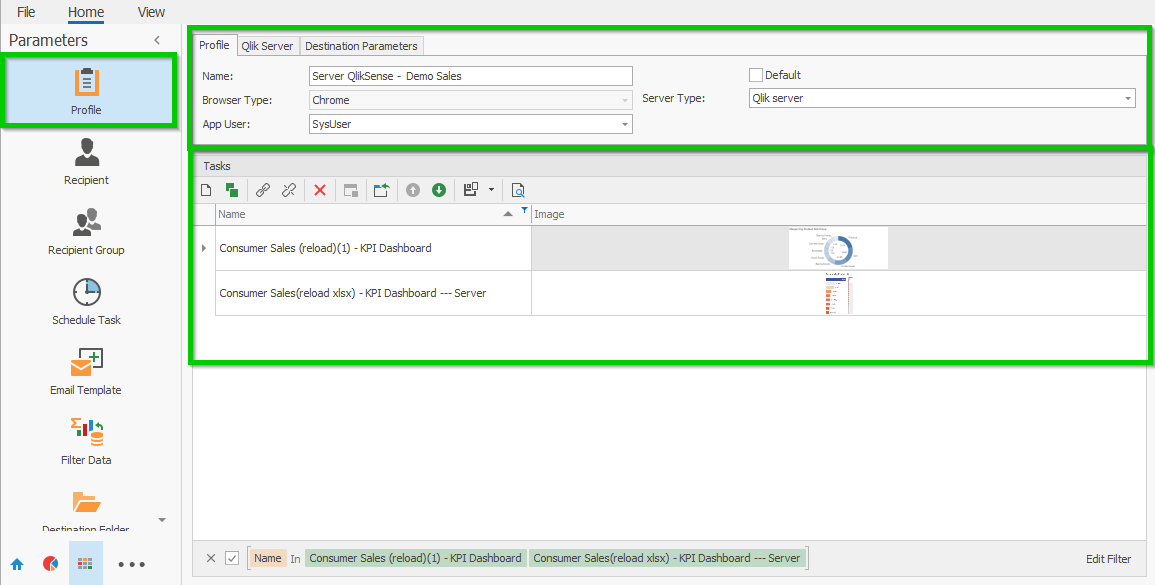
There are several tab views like
"Profile Tab" the Recipient collections for this Recipient Group
Name - The Profile description.
Default - If checked current Profile Template definition will be recommended in any new entity has Profile requirements.
Browser Type - Is the browser engine used by KlikShots and its allways Chrome.
App User - The profile owner user.
Server Type - Two values available, "Qlik Server" for InSite installations and "Qlik Saas" for Saas installations.

"Server Tab" the task collections for this Recipient
User Name - Qlik username.
Password - Qlik password.
Server Url - Qlik Server Url.
Log In Form Url - Qlik Server login url.

"Destination Parameters Tab" the Task Groups collections for this Recipient
Destination SMTP Server - List selection from available SMTP Servers.
Destination Folder - List selection from available Destination Folders.

3. User Report

User Report Module is under development.
4. Default
Task Event
Task Event List View
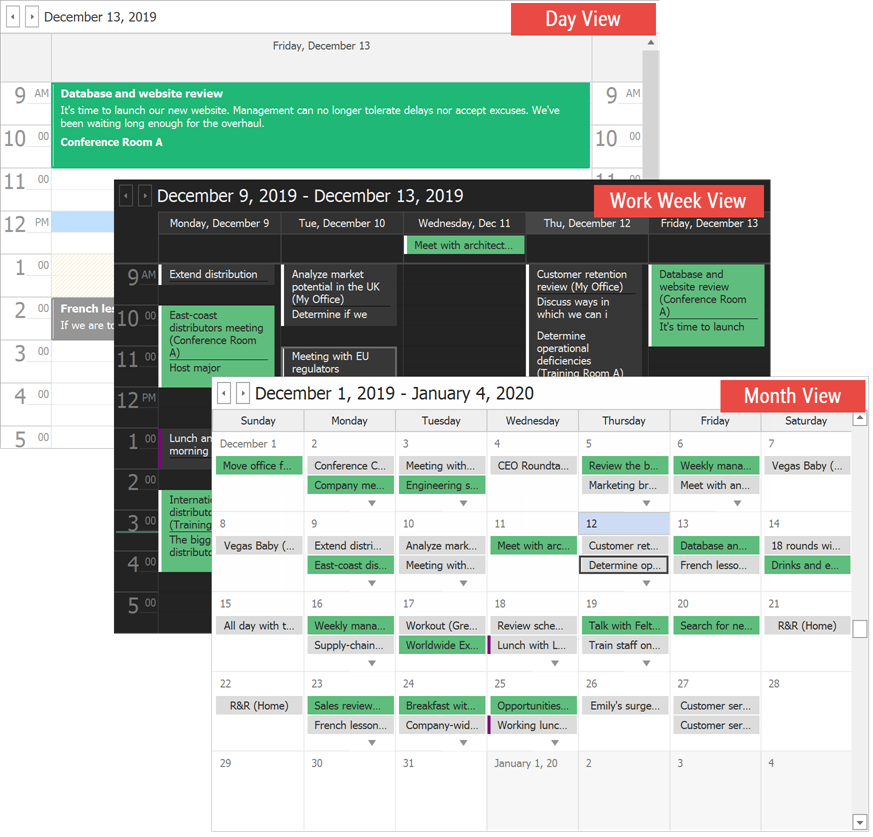
Task event is a calentar view which contains all the tasks performed at date and time when they were performed
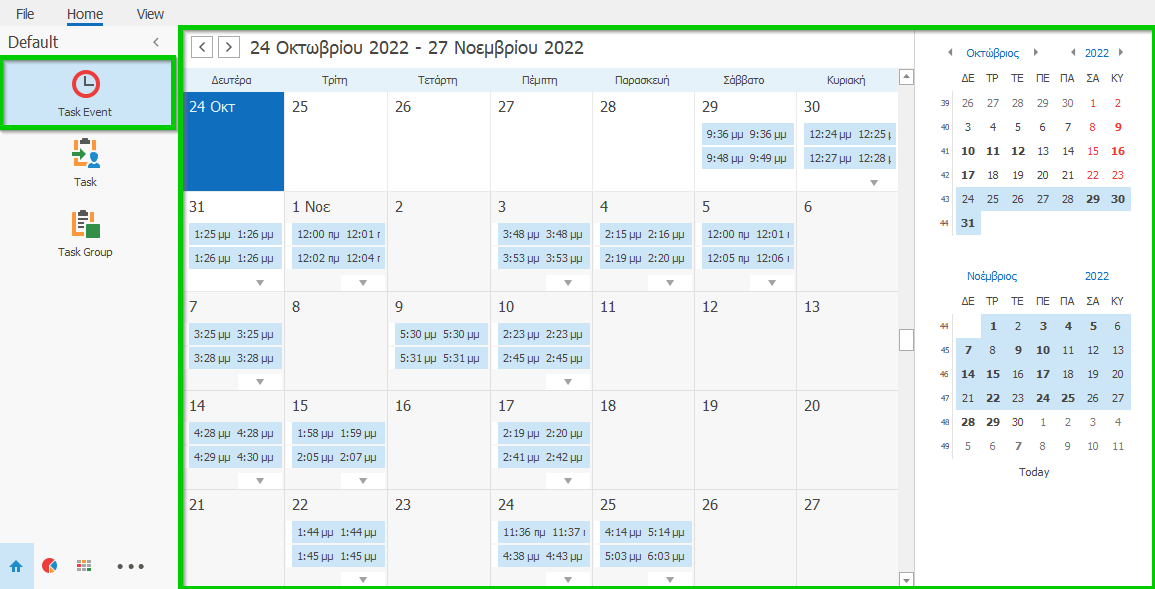
Depending on the selected View, a Task Event List View can divide the timeline into months, weeks (including or excluding weekends), and days.
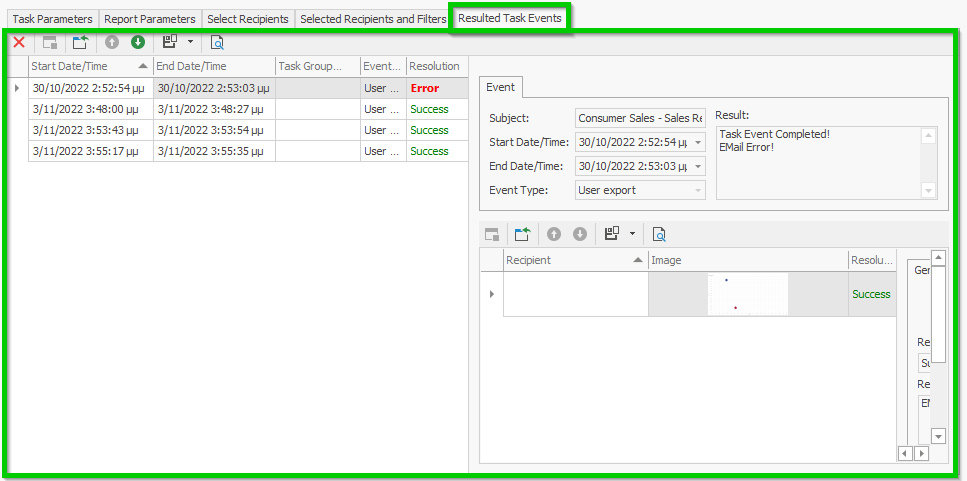
Task Event Detail View
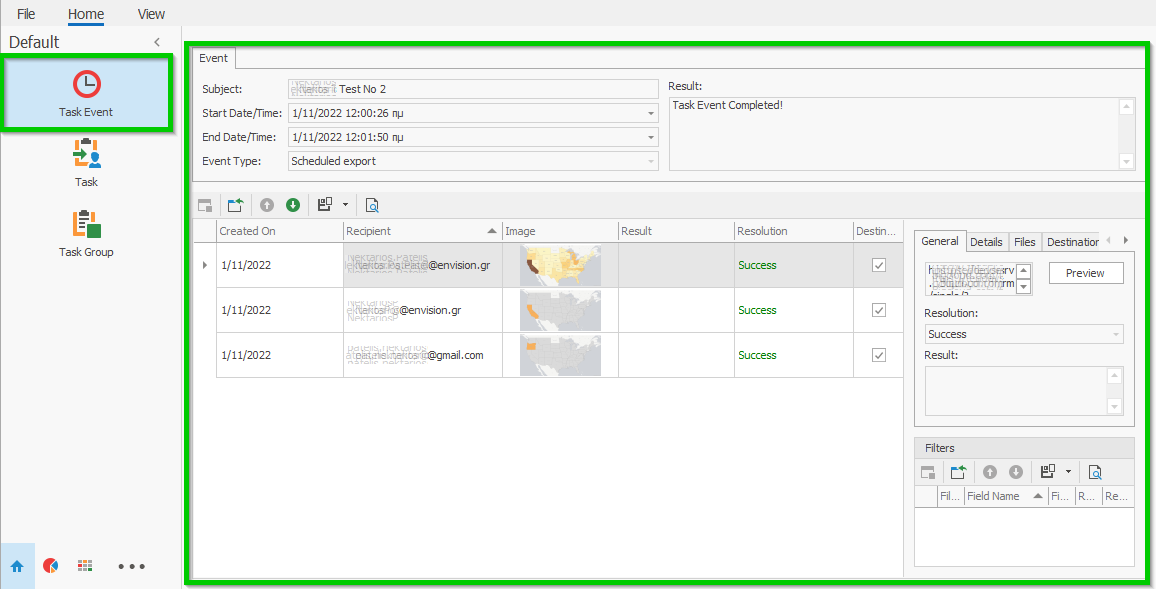
Event Tab - Information about the excuted task (Name, execution time, task type and task result)

Detail Result Tab - Detail information about task resolution per recipient

Task
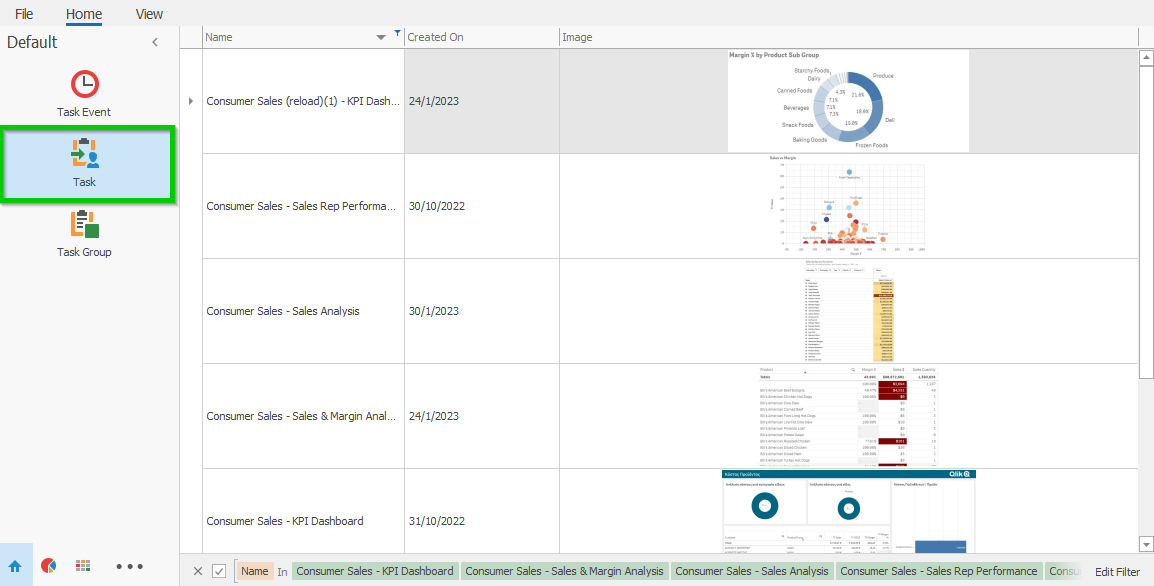
Task List View
Task Detail View
Task Detail View consists from two main regions, actions and detail tabs
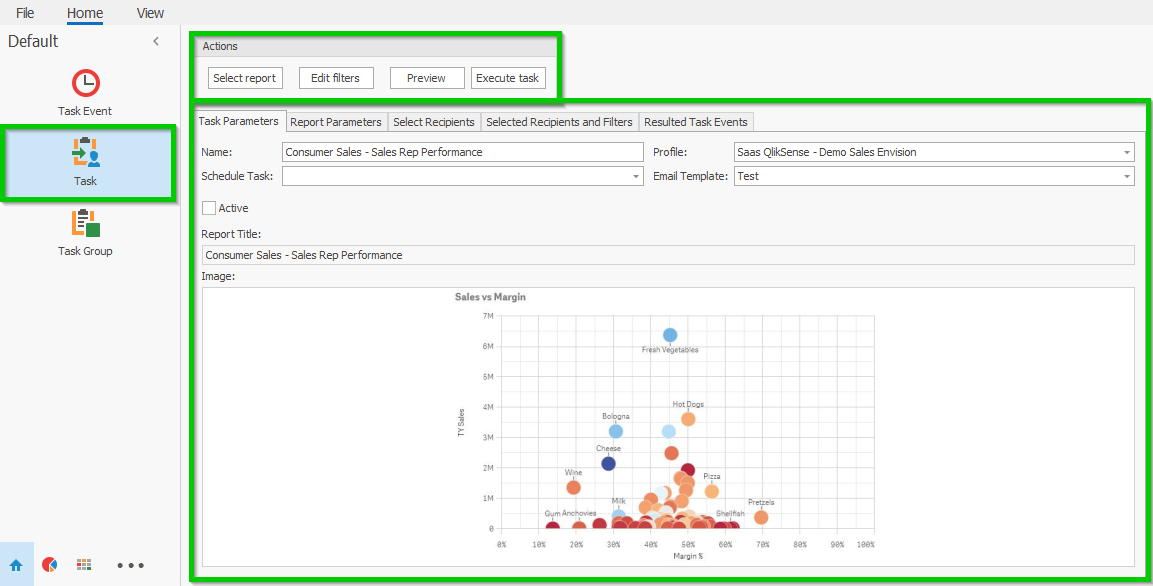
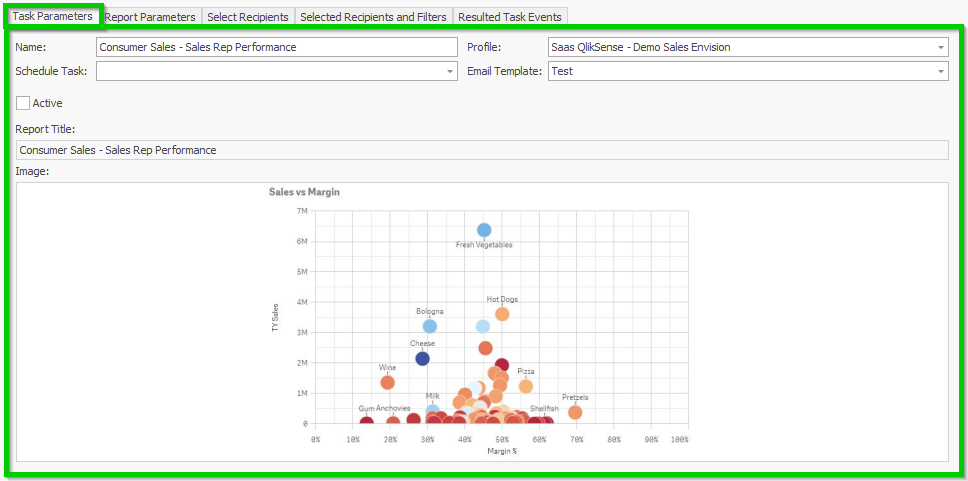
"Task Parameters Tab" properties:
Name - The description of the task.
Profile - A selection list of all available profiles.
Schedule Task - A selection list of all available schedulle tasks.
Email Template - A selection list of all available email templates.
Active - If checked the task will be included in the Scheduled automatic process.
Report Title - Title of the selected report as defined at the Qlik application.
Image - Preview of the selected Qlik report.
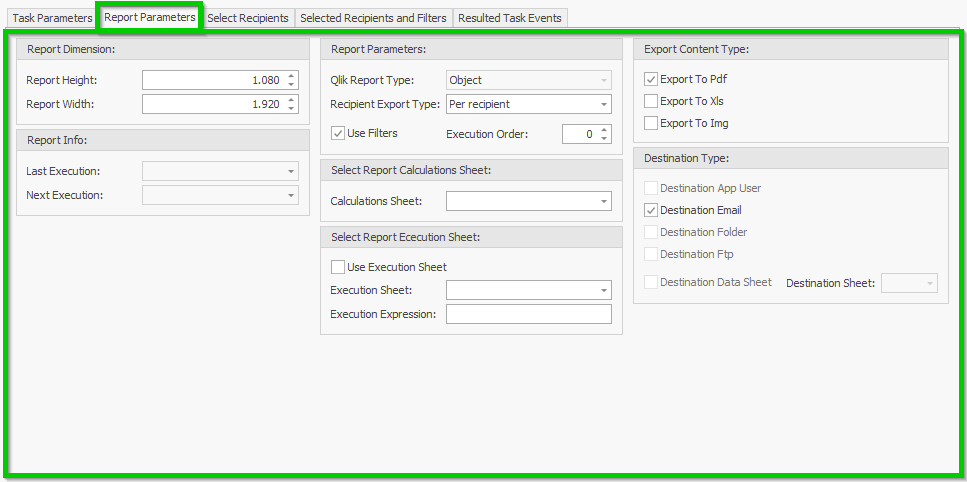
"Report Parameters Tab" properties:
Report Height - Report Height (In case of scrollable reports).
Report Width - Report Width (In case of scrollable reports).
Last Execution - Last time that the task executed as scheduled task.
Next Execution - Next time that the task will be executed as scheduled task.
Qlik Report Type - "Sheet" if the selected report is an entire Qlik Sheet or "Object" if the selected report is a single Qlik object.
Recipient Export Type - "Per Recipient" if the report will be created per recipient or "All In One" if the report will be created once for all recipients.
Use Filters - If checked filters can applied per recipient.
Execution Order - Order of execution when executed as scheduled task.
Calculations Sheet - A selection list of all available filter data spreadsheets.
Use Execution Sheet - Under Development.
Execution Sheet - Under Development.
Execution Expression - Under Development.
Export to PDF - Exports selected Qlik report as PDF.
Export to XLS - Exports selected Qlik report as XLS.
Export to IMG - Exports the selected Qlik report as IMG.
Destination App User - Under Development.
Destination EMail - Sends selected Qlik report as email.
Destination Folder - Under Development.
Destination Ftp - Under Development.
Destination Data Sheet - Under Development.
Destination Sheet - Under Development.
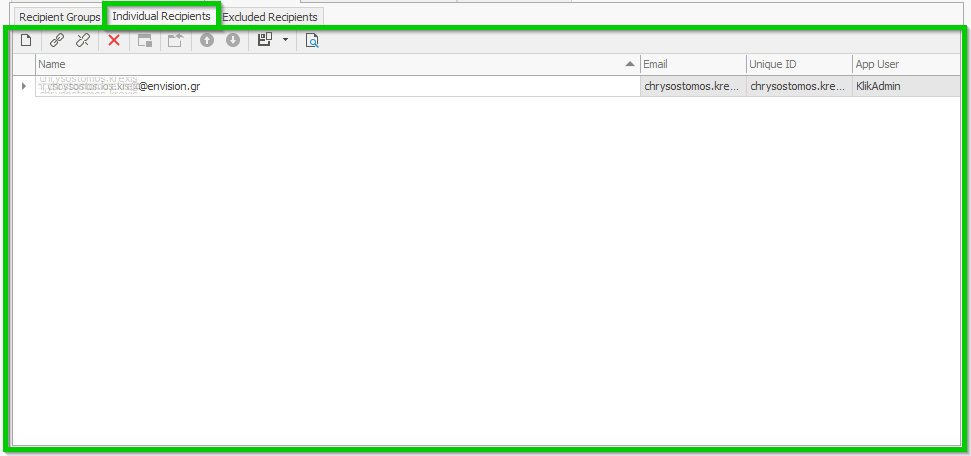
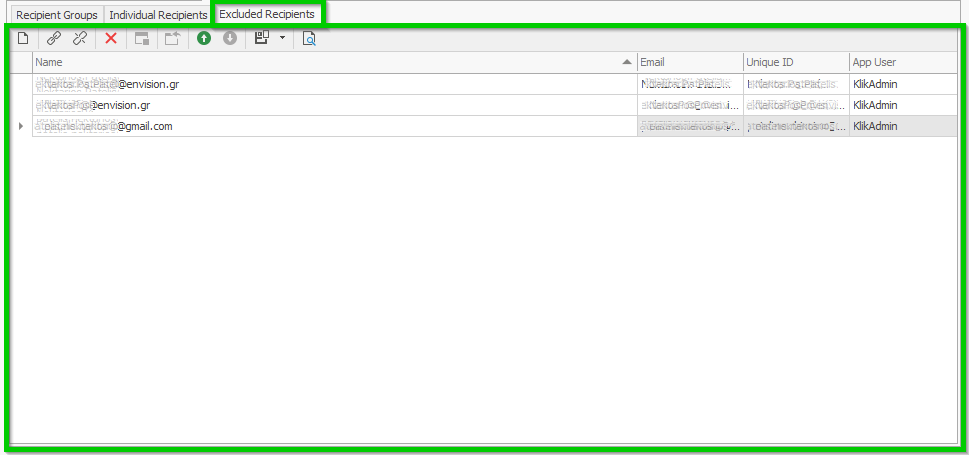
"Select Recipients Tab" properties:
Recipient Groups Tab, Individual Recipients Tab and Excuded Recipients Tab.
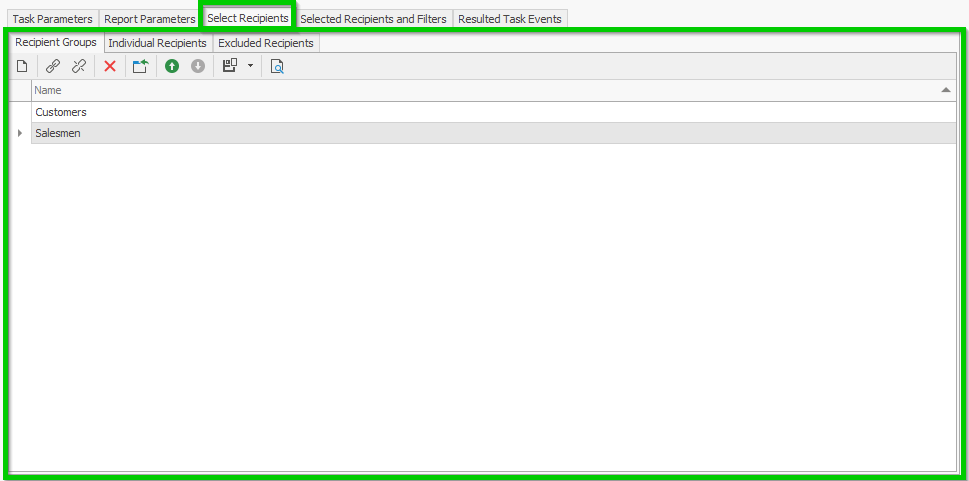
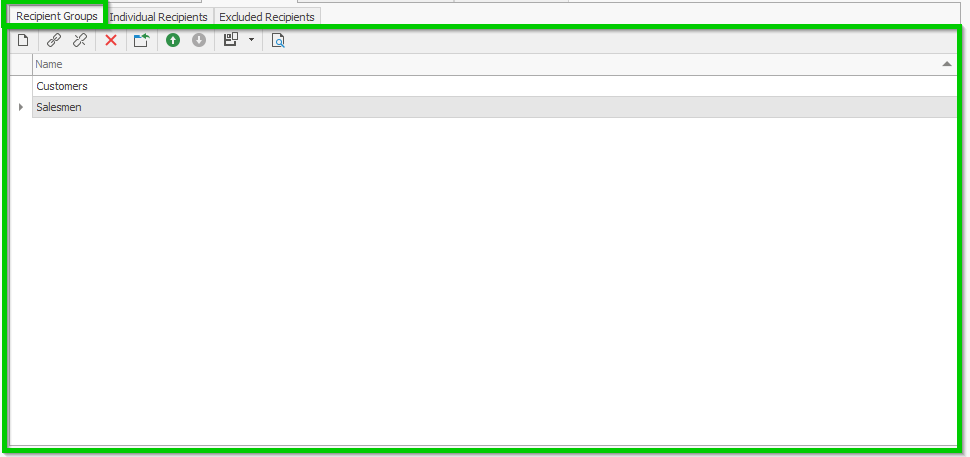
Recipient Groups Tab - Select Recipient Groups from all available Groups.
Individual Recipients Tab - Select individual recipients.
Excuded Recipients Tab - Select recipients that will be excluded.
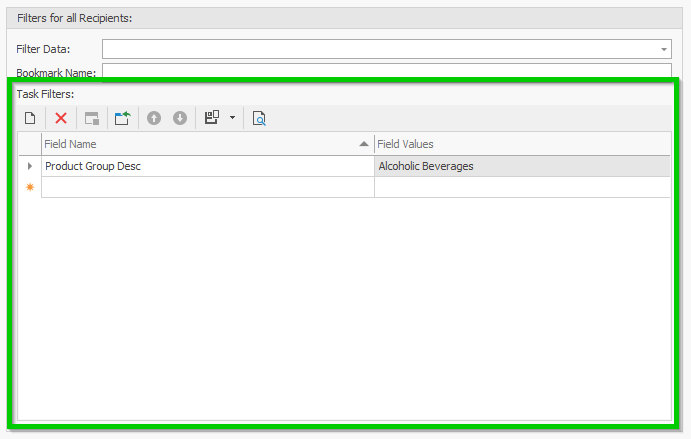
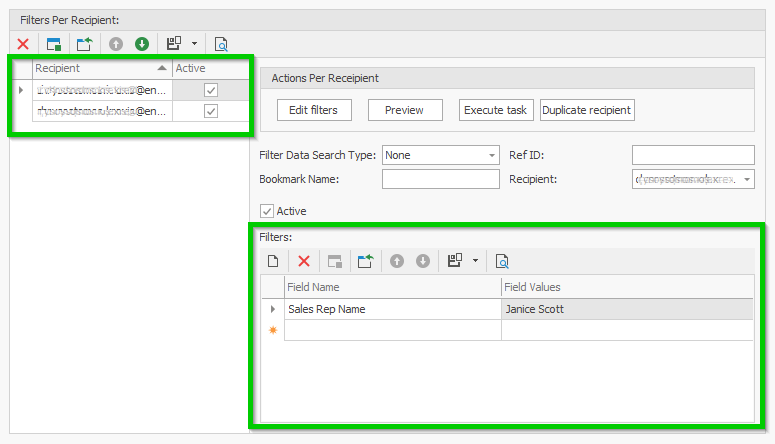
Recipients And Filters Tab - Select Qlik Dimensions and set filter values to create filtered repoprts.
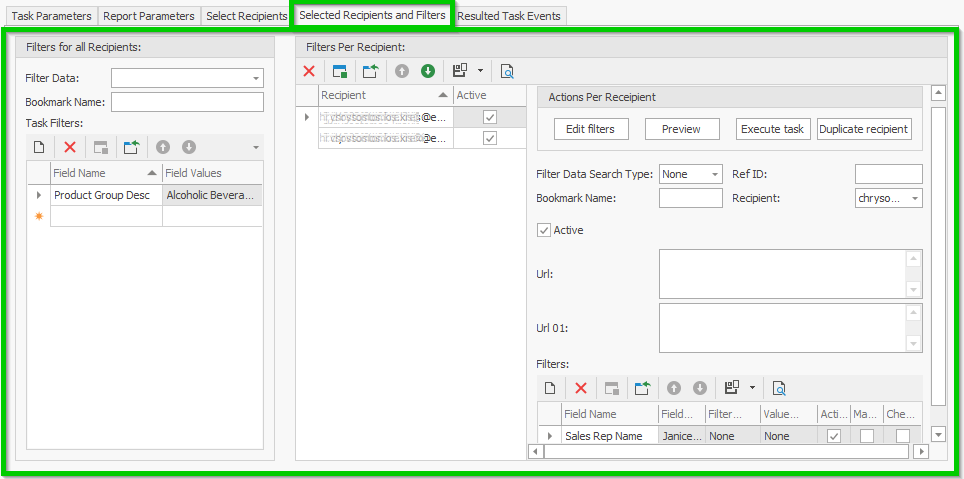
At the left there is a region named "Filters for all recipients" to define filter values to apply on all recipients.
At the right there is a region named "Filters per recipient" to define filter values to apply per recipients.
Resulted Task Events Tab - There is a list of all executed task events with their resolution! We can review unsuccessful task events and errors!
There are four action within Task entity!
Select Report, Edit Filters, Preview and Execute Task.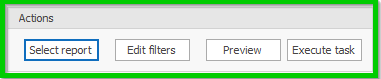
"Select Report" Action
The first thing we must do when we create a new report is to select a Qlik Sheet or a Qlik object from a Qlik application by pressing "Select Report" Action.
When "Select Report" action excuted a form will pop out with all the available Qlik applications to choose from! Then we can select one of them in the same way as we open an appliction in Qlik environment by click on it!

Then in a Qlik environment we have all the available Qlik Sheets of the selected apllication to choose from! Again we click on the one that we want to open it!
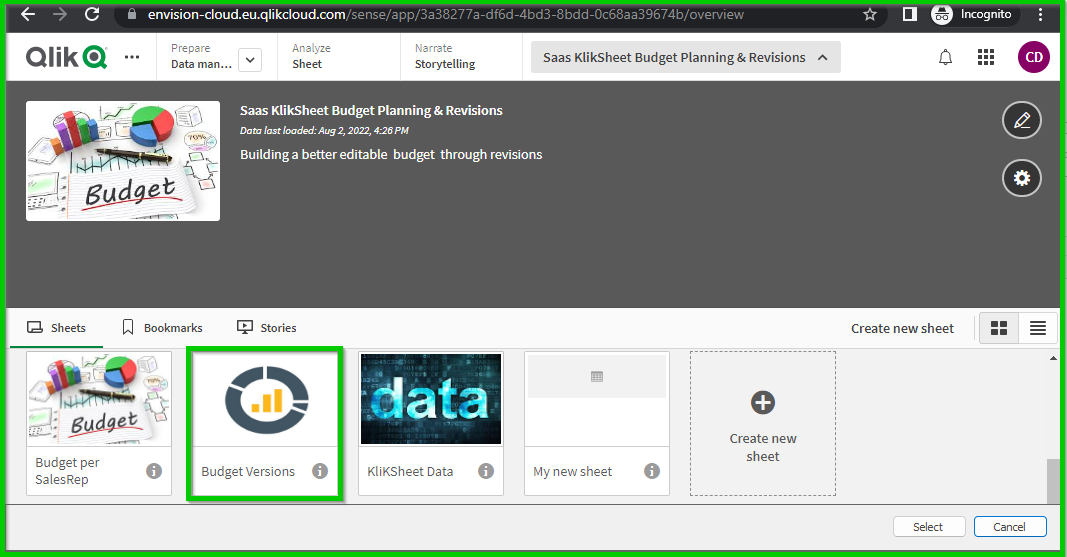
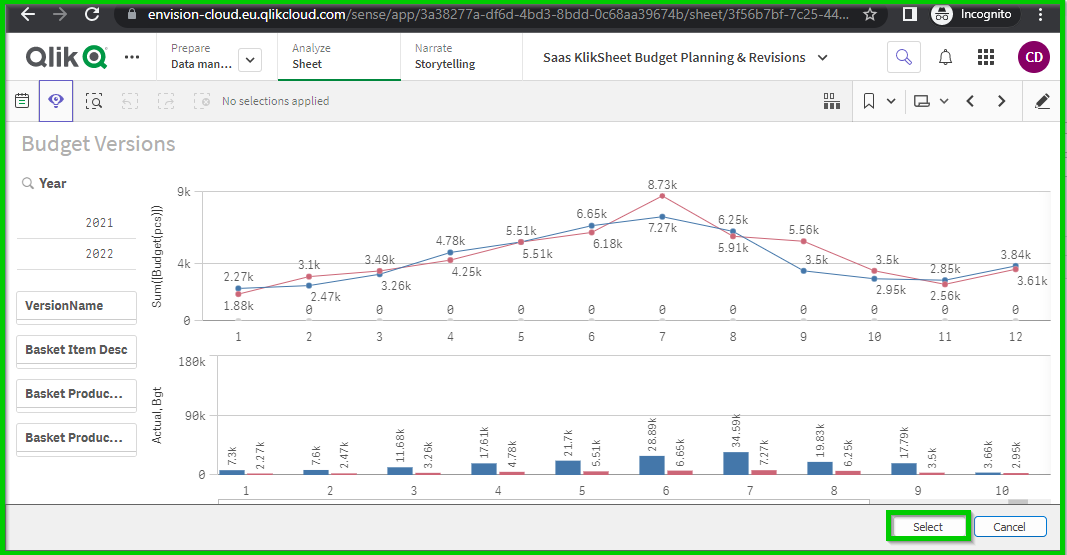
When the selected Qlik Sheet has opened we click "Select" from the right botton corner of the form to insert our selection sheet as a report to KlikShots!
"Filters" Action
With "Filters" action we follow the same steps as we did with "Select Report" action!
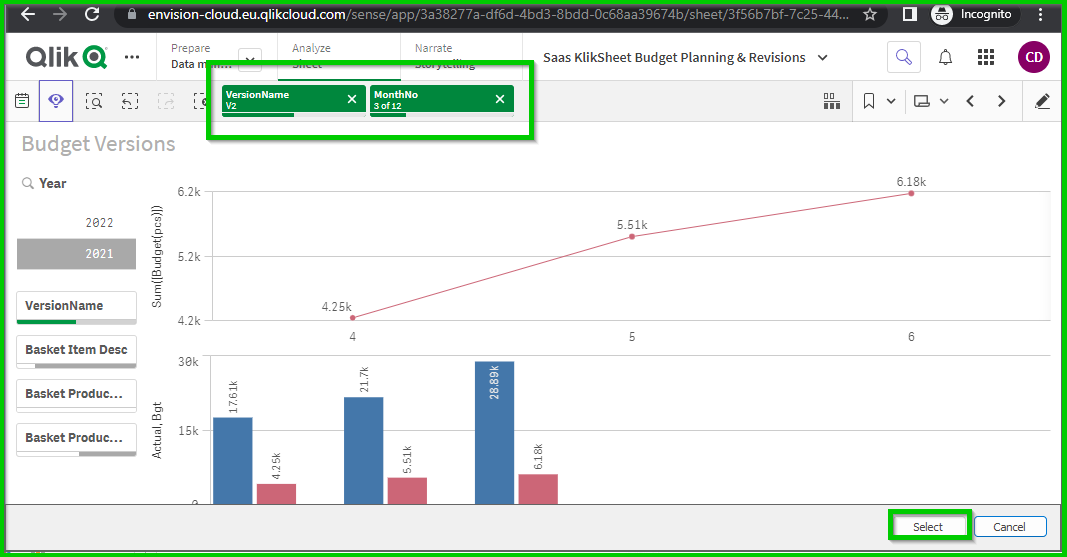
When a Qlik Sheet form is open in our screen thwn we can apply some filters on Qlik filter bar!
This time when we click "Select" from the right botton corner of the form KlikShots reads the applied filters an stores them to KlikShots database!
The next time KlikShots needs to execute the current task will use thoose selection tou filter the produced report!
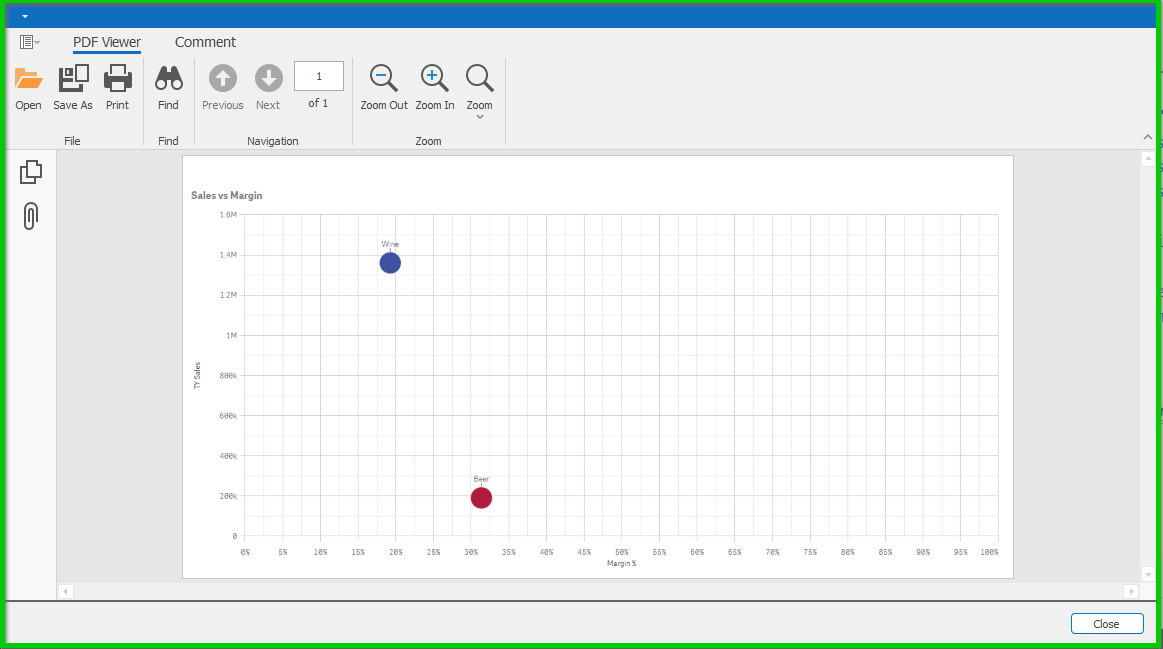
"Preview" Action
With "Preview" we get in a PDF Viewer a preview of our report in a form that our recipients will see it in order to make necessary changes before we send it!
"Execute" Action
With "Execute" action we finalize and execute our task! KlikShots will create the report, filter it if needed an sent it to the recipients as a email!
Task Group
Task Group List View
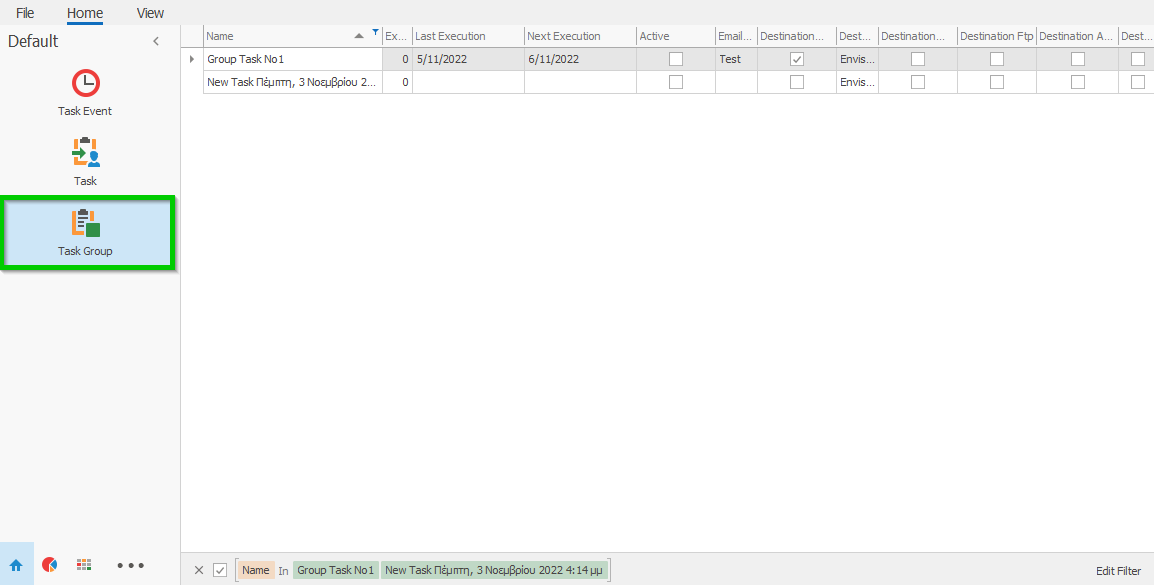
Task Group Detail View
"Task Group Tab" properties:
Code - Auto generated (You can change it, but its must be unique).
Name - The description of the task group.
Email Template - A selection list of all available email templates.
Active - If checked the task will be included in the Scheduled automatic process.
Schedule Task - A selection list of all available schedulle tasks.
SMTP Server - A selection list of all available SMTP Servers.
Last Execution and next execution - informational dates based on Schedule Task cron job scheduling!
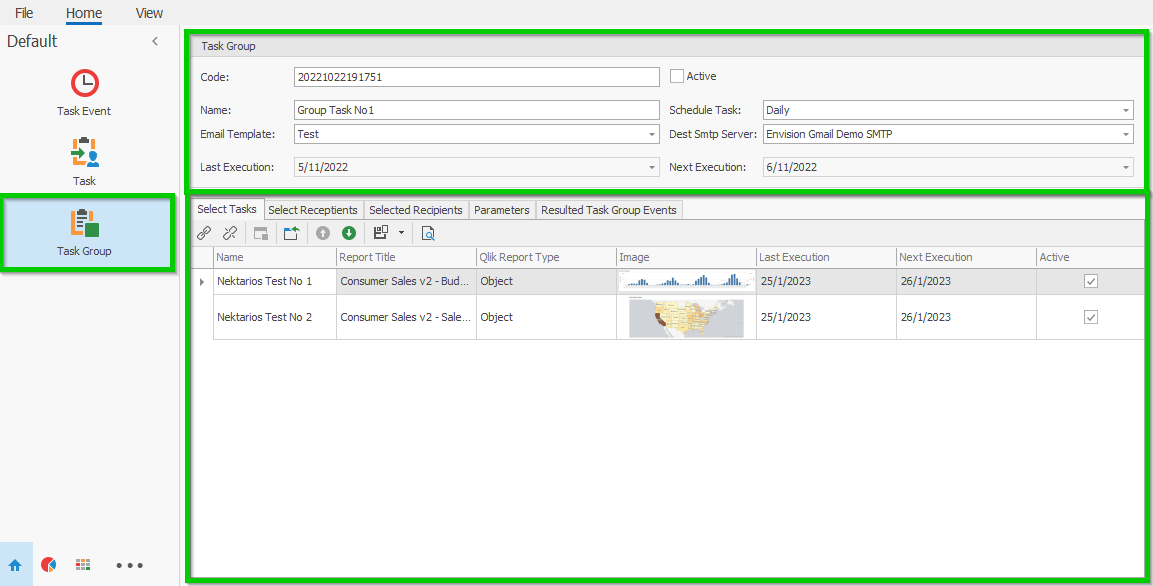
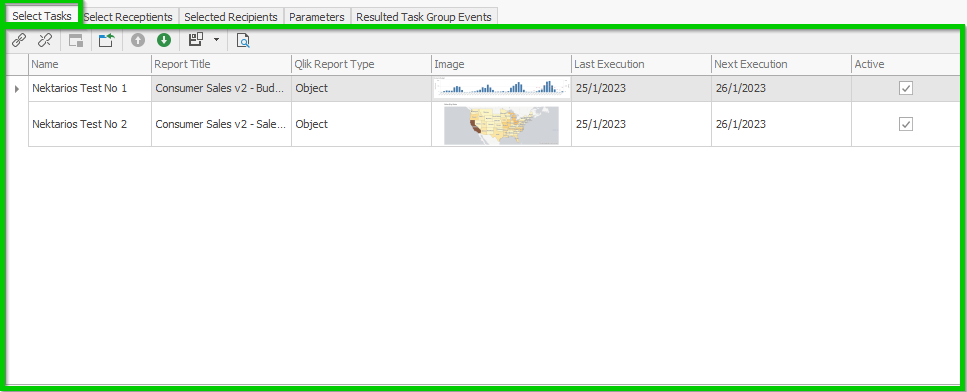
"Select Task Tab" - We can create a collection of task to include in current task group.
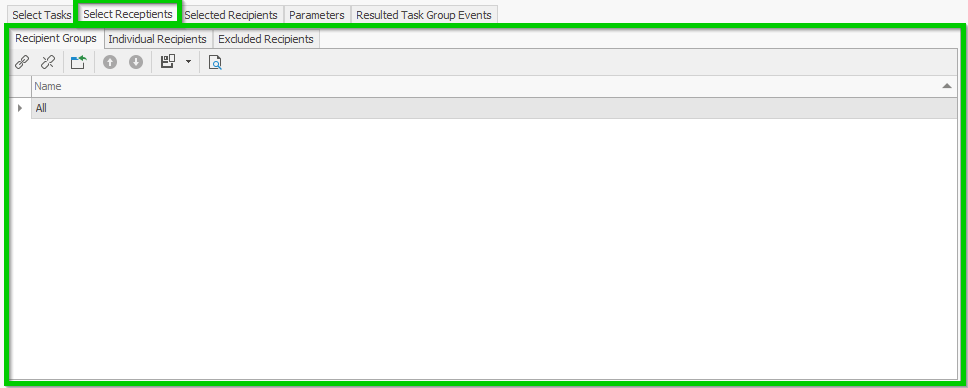
"Select Recipients Tab" - We can create a collection of recipients to include in current task group.(We follow the same procedure like in Tasks)
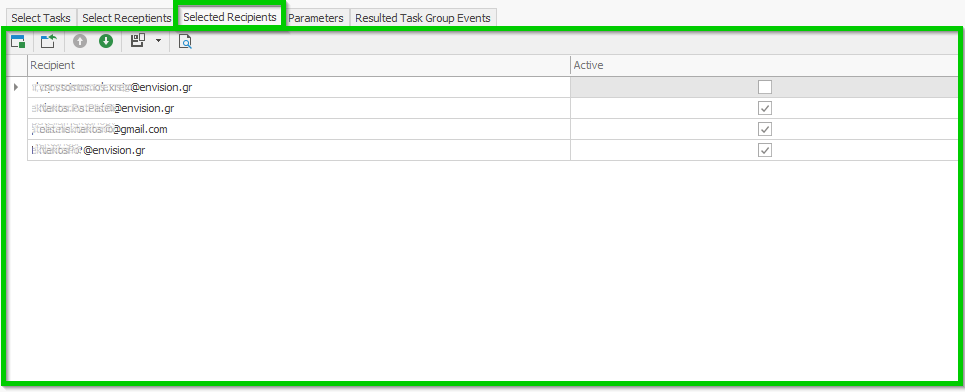
"Selected Recipients Tab" - We can see current task collection of recipients and we can activate or disactivate recipients based to our needs before we execute task group.
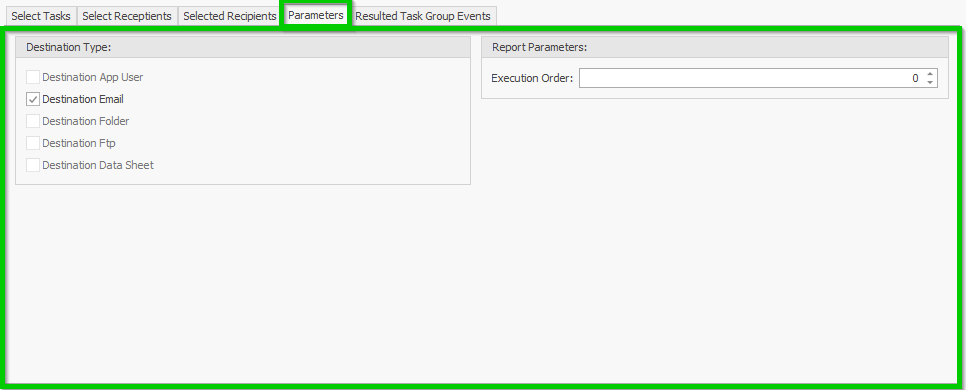
"Parameters Tab Properties:"
Destination App user - Under development
Destination Email - Sets the task group to enable email as a means of repor dispatching.
Destination Folder - Under development
Destination Ftp - Under development
Destination Data Sheet - Under development
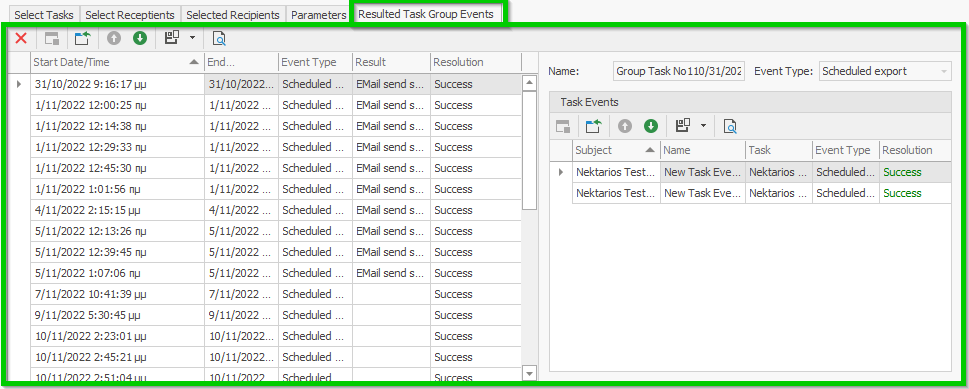
Resulted Task Events Tab - There is a list of all executed task events with their resolution! We can review unsuccessful task events and errors!
Support
If this documentation doesn't answer your questions, So, Please send us Email to support@applybi.com or post a ticket via KlikShots Support Page
We are located in GMT +3:00 time zone and we answer all questions within 12-24 hours in weekdays. In some rare cases the waiting time can be to 48 hours. (except holiday seasons which might take longer).
Changelog
See what's new added, changed, fixed, improved or updated in the latest versions.
Version 1.22.11 (22 Dec, 2022)
- Added Task Groups
- Added Sent report as XLSX file
- Fixed Some minor bugs for browser compatibility
Version 1.0 (8 April, 2022)
Initial Release